There’s only a niche interest in this one, so I’ll keep it brief. It’s a break in box and break in box for pin 7 on a roland synth system. Catchily named BOBBIB7.
UPDATE 2017: This is now for sale at RSD Sound.
This is a PCB I designed for use with GR55 and similar guitar synth pedals and GK equipped guitars, such as Godin, Brian Moore, Fender Roland-Ready Strats etc.
I’m going to assume that if you’re reading this you know what a GR55 is and what a GK guitar cable is.
The 13 pin GK cable’s pinout can be found here.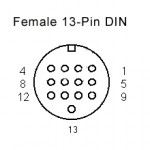
You can see on John’s page that the normal magnetic guitar signal is found on pin7, so accessing this pin with ‘normal’ jacks is useful. This board has 3 functions, detailed below.
GK cable Break out box:
The GR55’s guitar out socket is quite noisy, too noisy for use with high gain amps. This is due to the large number of switcheroos (technical term) inside the GR55 pedal demodulating and getting onto the audio signal.
To avoid this, many users (including me, up to now) run the magnetic signal down a normal lead and the GK signal down a GK lead. By plugging a GK cable into the BOBBIB7 GKinput, and a jack into the output, you can tap off the magnetic tone without it ever entering the pedal. You must also have the GK output connected to a GR55 because the GK pickup buffers your mag signal in order to send it down the GK cable and so requires GR55 power.
GR55 Break in box:
This is the best bit. By plugging a normal guitar into the jack input and a GK cable into the to GK output you can use any guitar with the modelling awesomeness of the GR55. I use the GR55 as a ‘second amp’ when playing live and I’ve wanted to do this for ages, so I can do gigs with any guitar and not just my GK ones. Also useful if you’ve got a string breaking problem on your GK guitar. The board has space for a little amplifier to amplify the mag guitar signal, providing the LoZ source that the GR55 will expect. It uses a single SMT FET and a handful of 0805 passive components.
GR55 as a multiFX pedal:
I haven’t tried this yet, but it should work fine. By plugging an FX send into the jack input and an FX return into the GR55 mono output you can use the various FX channels of the GR55 with any normal setup. Darned useful. EDIT (April ’16): I have now tried and gigged this setup in the FX loop of my amp. It does indeed work very well! I ran the Patch Level between 100-130 and the volume knob at about 11 o’clock.
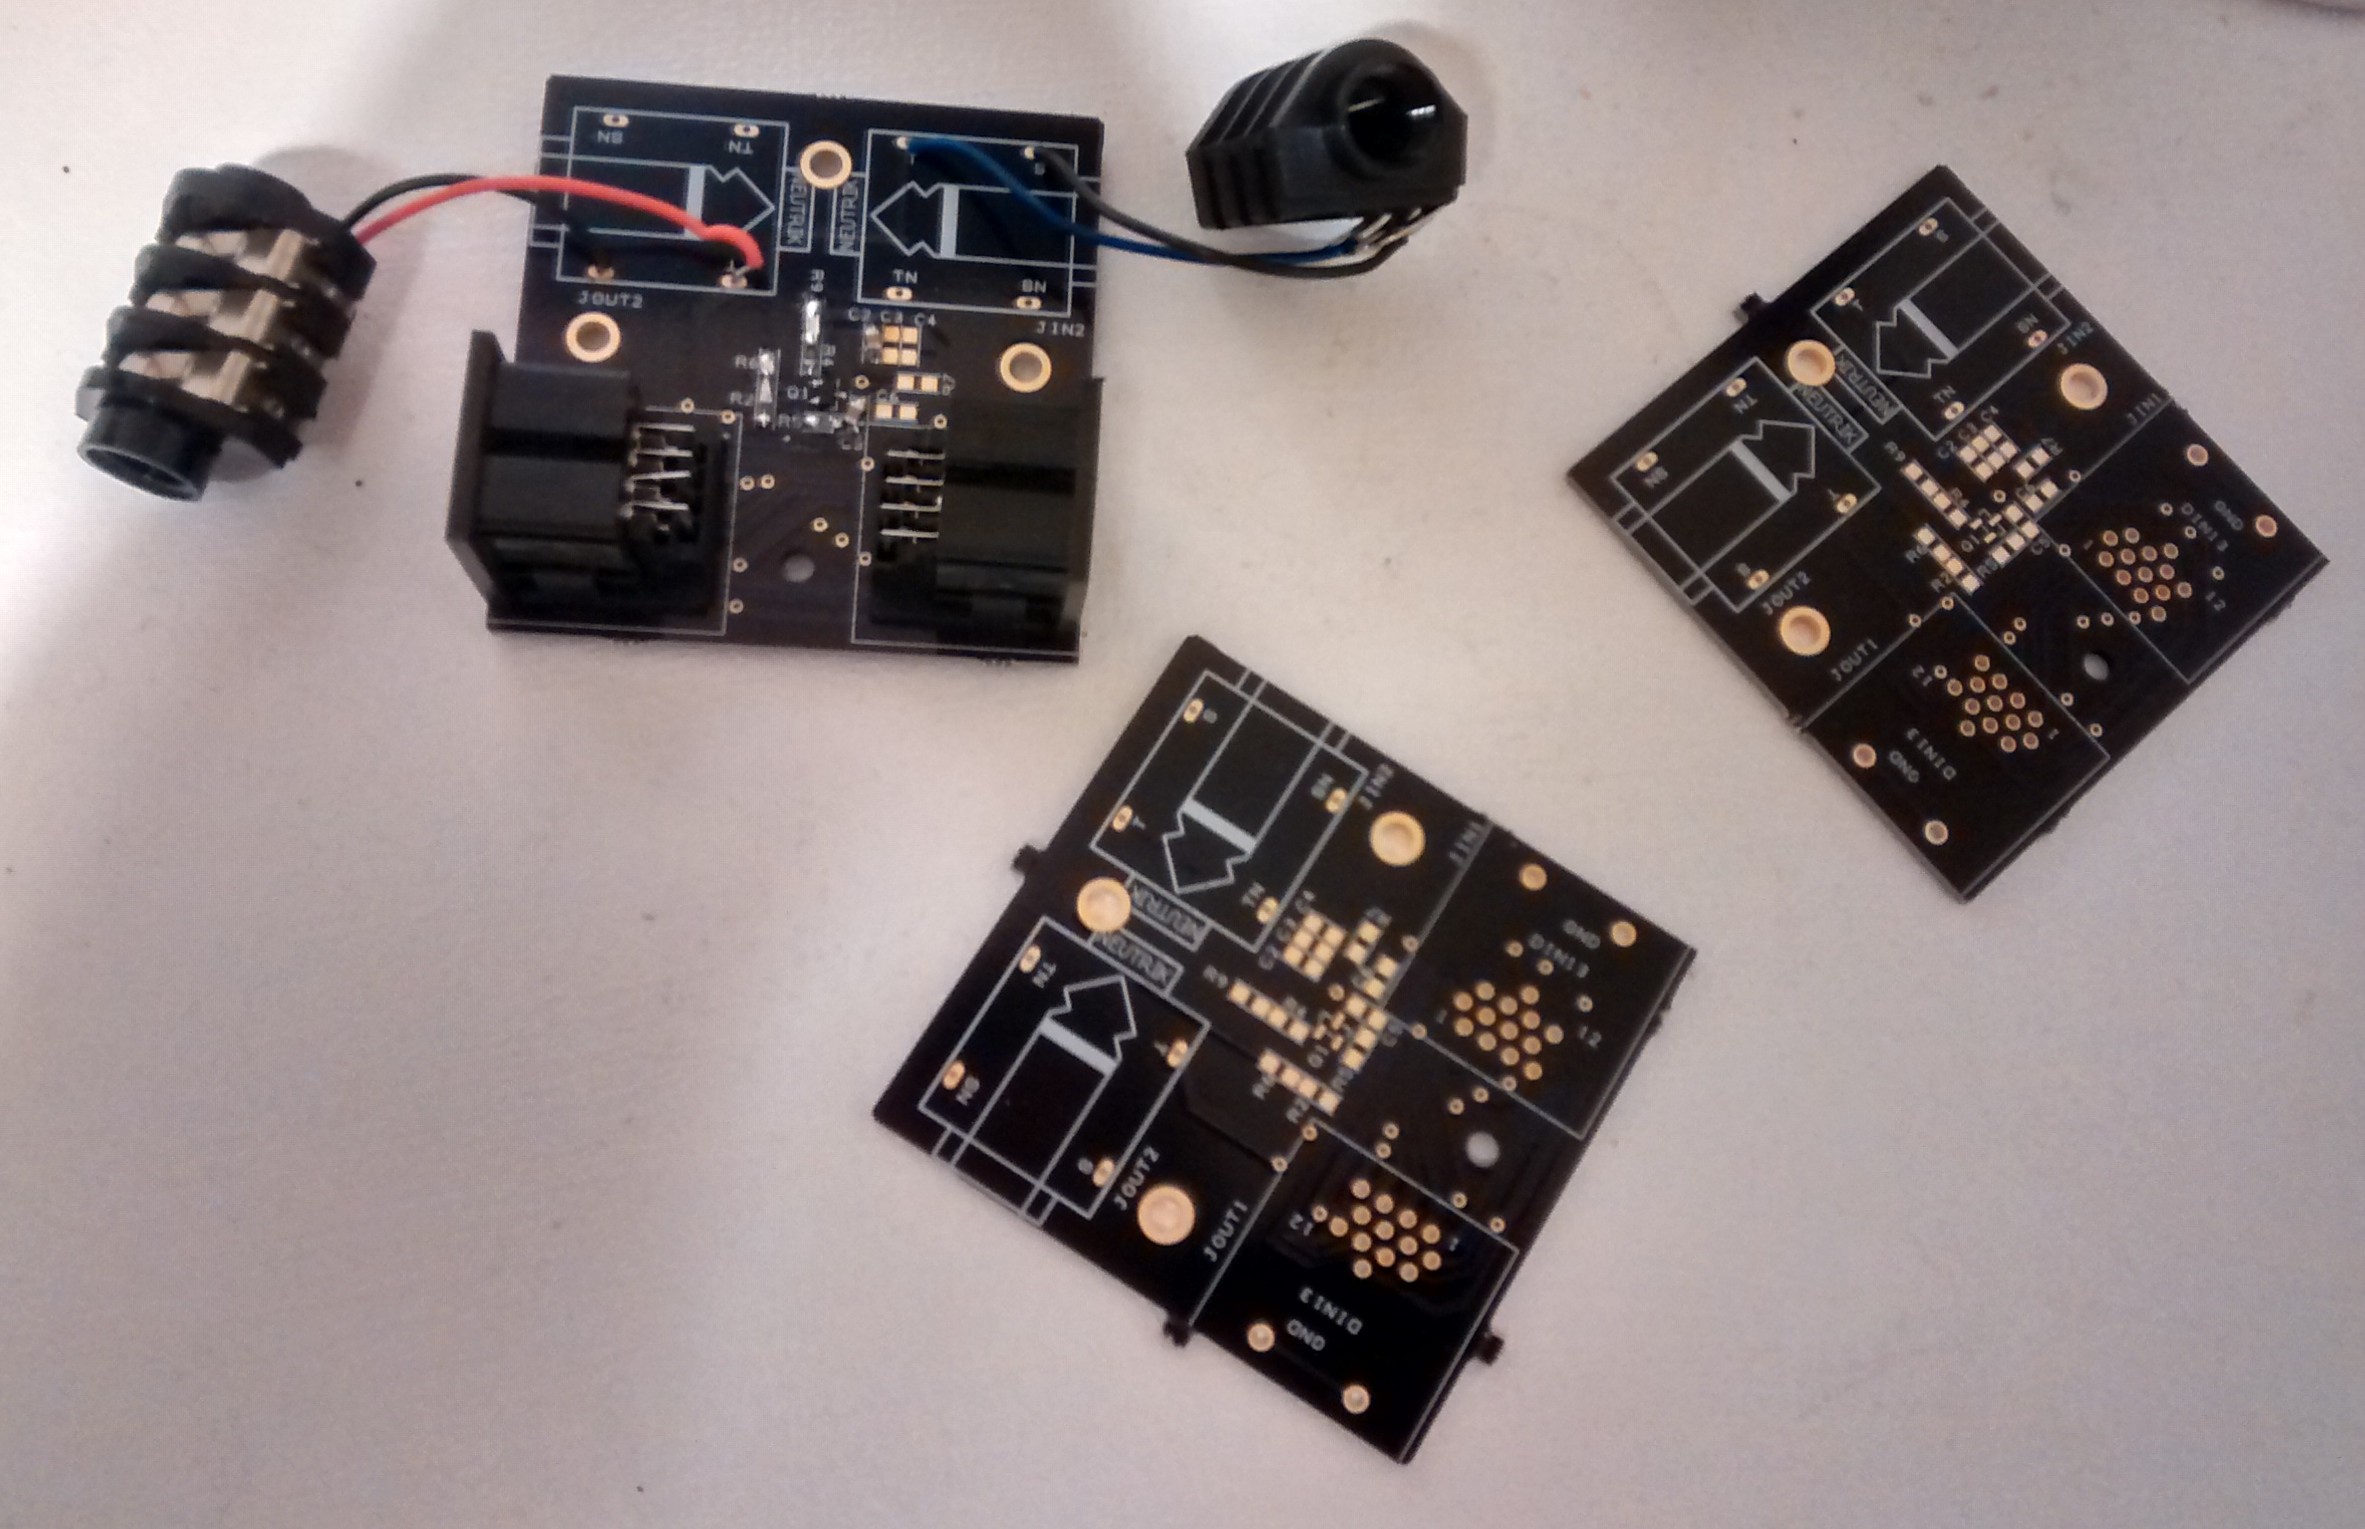
BIBBOB7 Schematic:
Nothing to it really. BIBBOB GK GR55 pin7 break out board
More info:
- 1.6mm FR4
- Purple solder resist, which sounds better.
- Gold Plated pads and through plating.
- 2 sided board, through hole plated
- Board designed to fit into a musikding.de B type box, which is their version of the Hammond 1590B
- Runs from the GK 7-0-7 supply, no batteries or PSU needed.
- I couldn’t find the jacks that fit the board at my local supplier (farnell UK) so I’ve wired them floating as in the pic.
Select between mag on a GK guitar and a mag only guitar
I’ve been asked about adding a switch to select p7 input between mag thru GK cable and mag from jack. This can be done with a few simple mods. Badly scanned scribbles here.
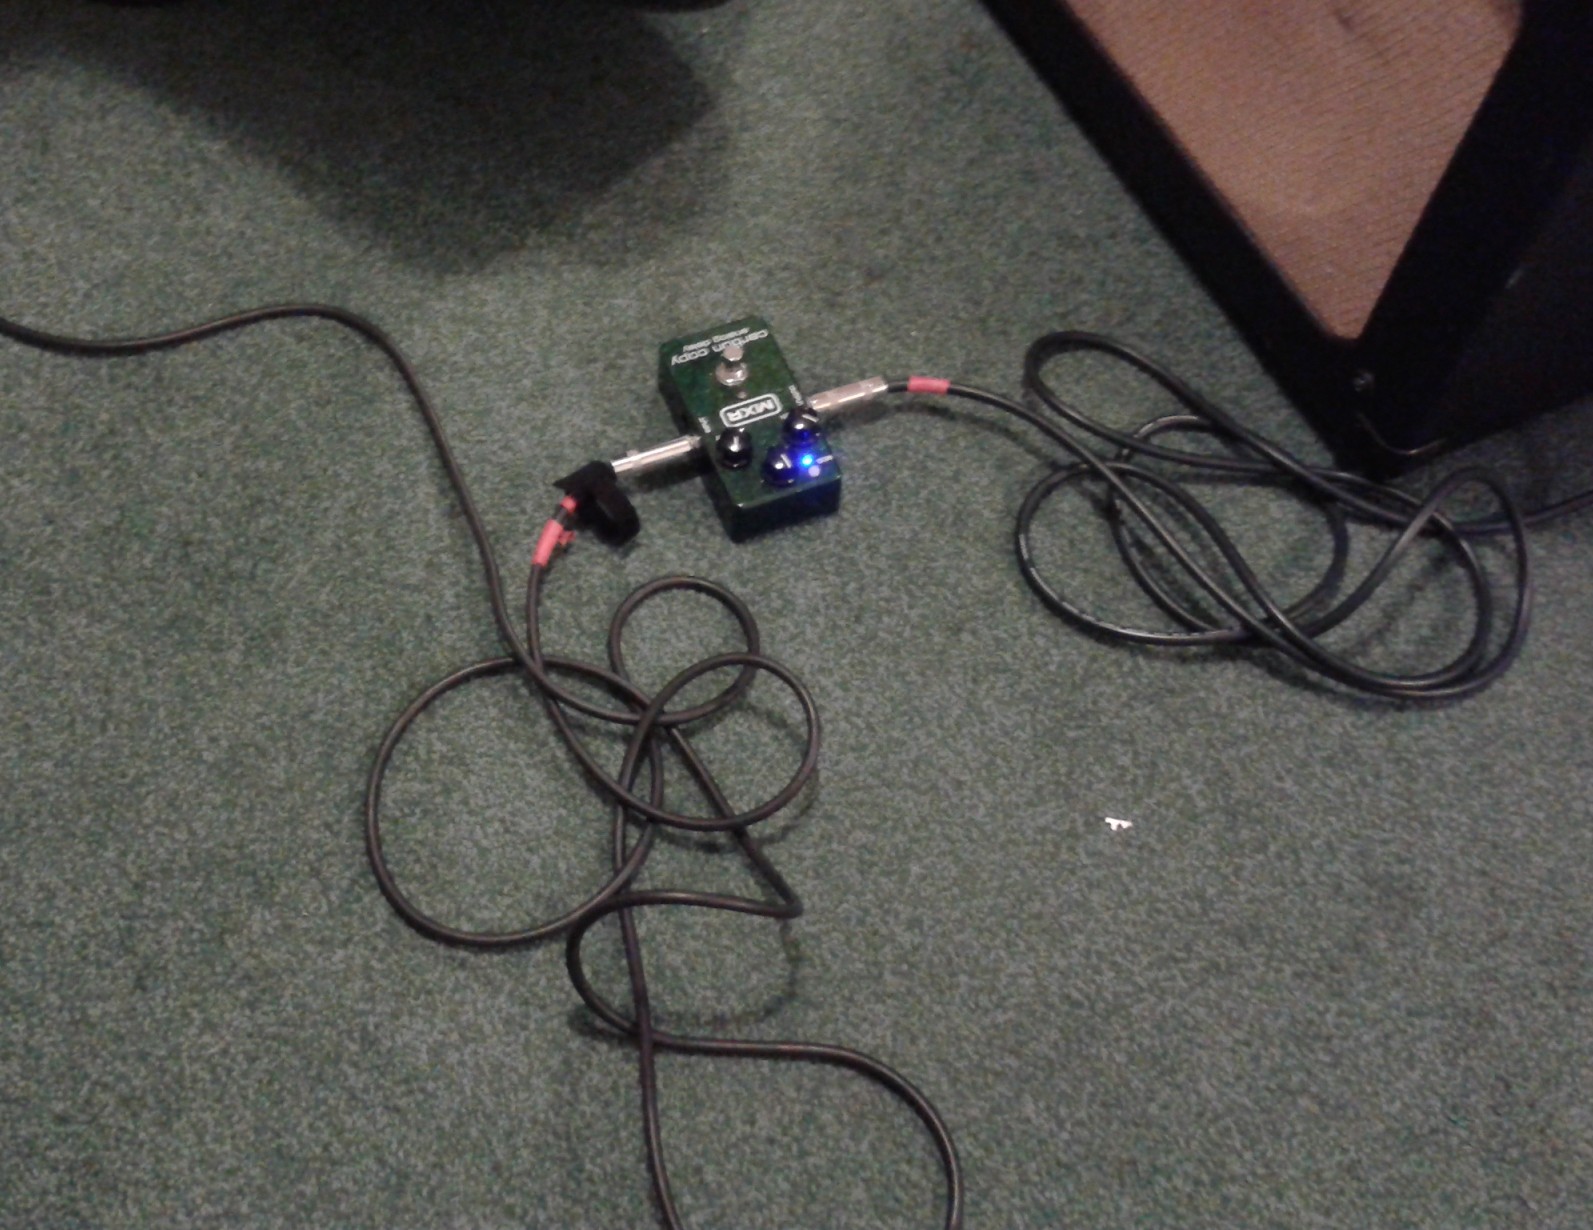
However, you could actually use the board with two jacks as originally and install a cheap passive AB or ABY switcher box. This would select between the mag-only straight from the guitar and the break-out jack of the BOBBIB. The output would go to the break-in jack, through the buffer and to the GK. Obviously there’s no real use for the “Y” mode here. Here’s a video of the idea in action:
Disclaimer:
I cannot be held responsible for any loss, personal injury or damage to equipment resulting from the use/misuse of the BOBBIB7 or information on this page.
Available:
This is now for sale at RSD Sound. When out of stock at RSD Sound, I will build to order.
http://www.vguitarforums.com/smf/index.php?topic=15383.msg109823


