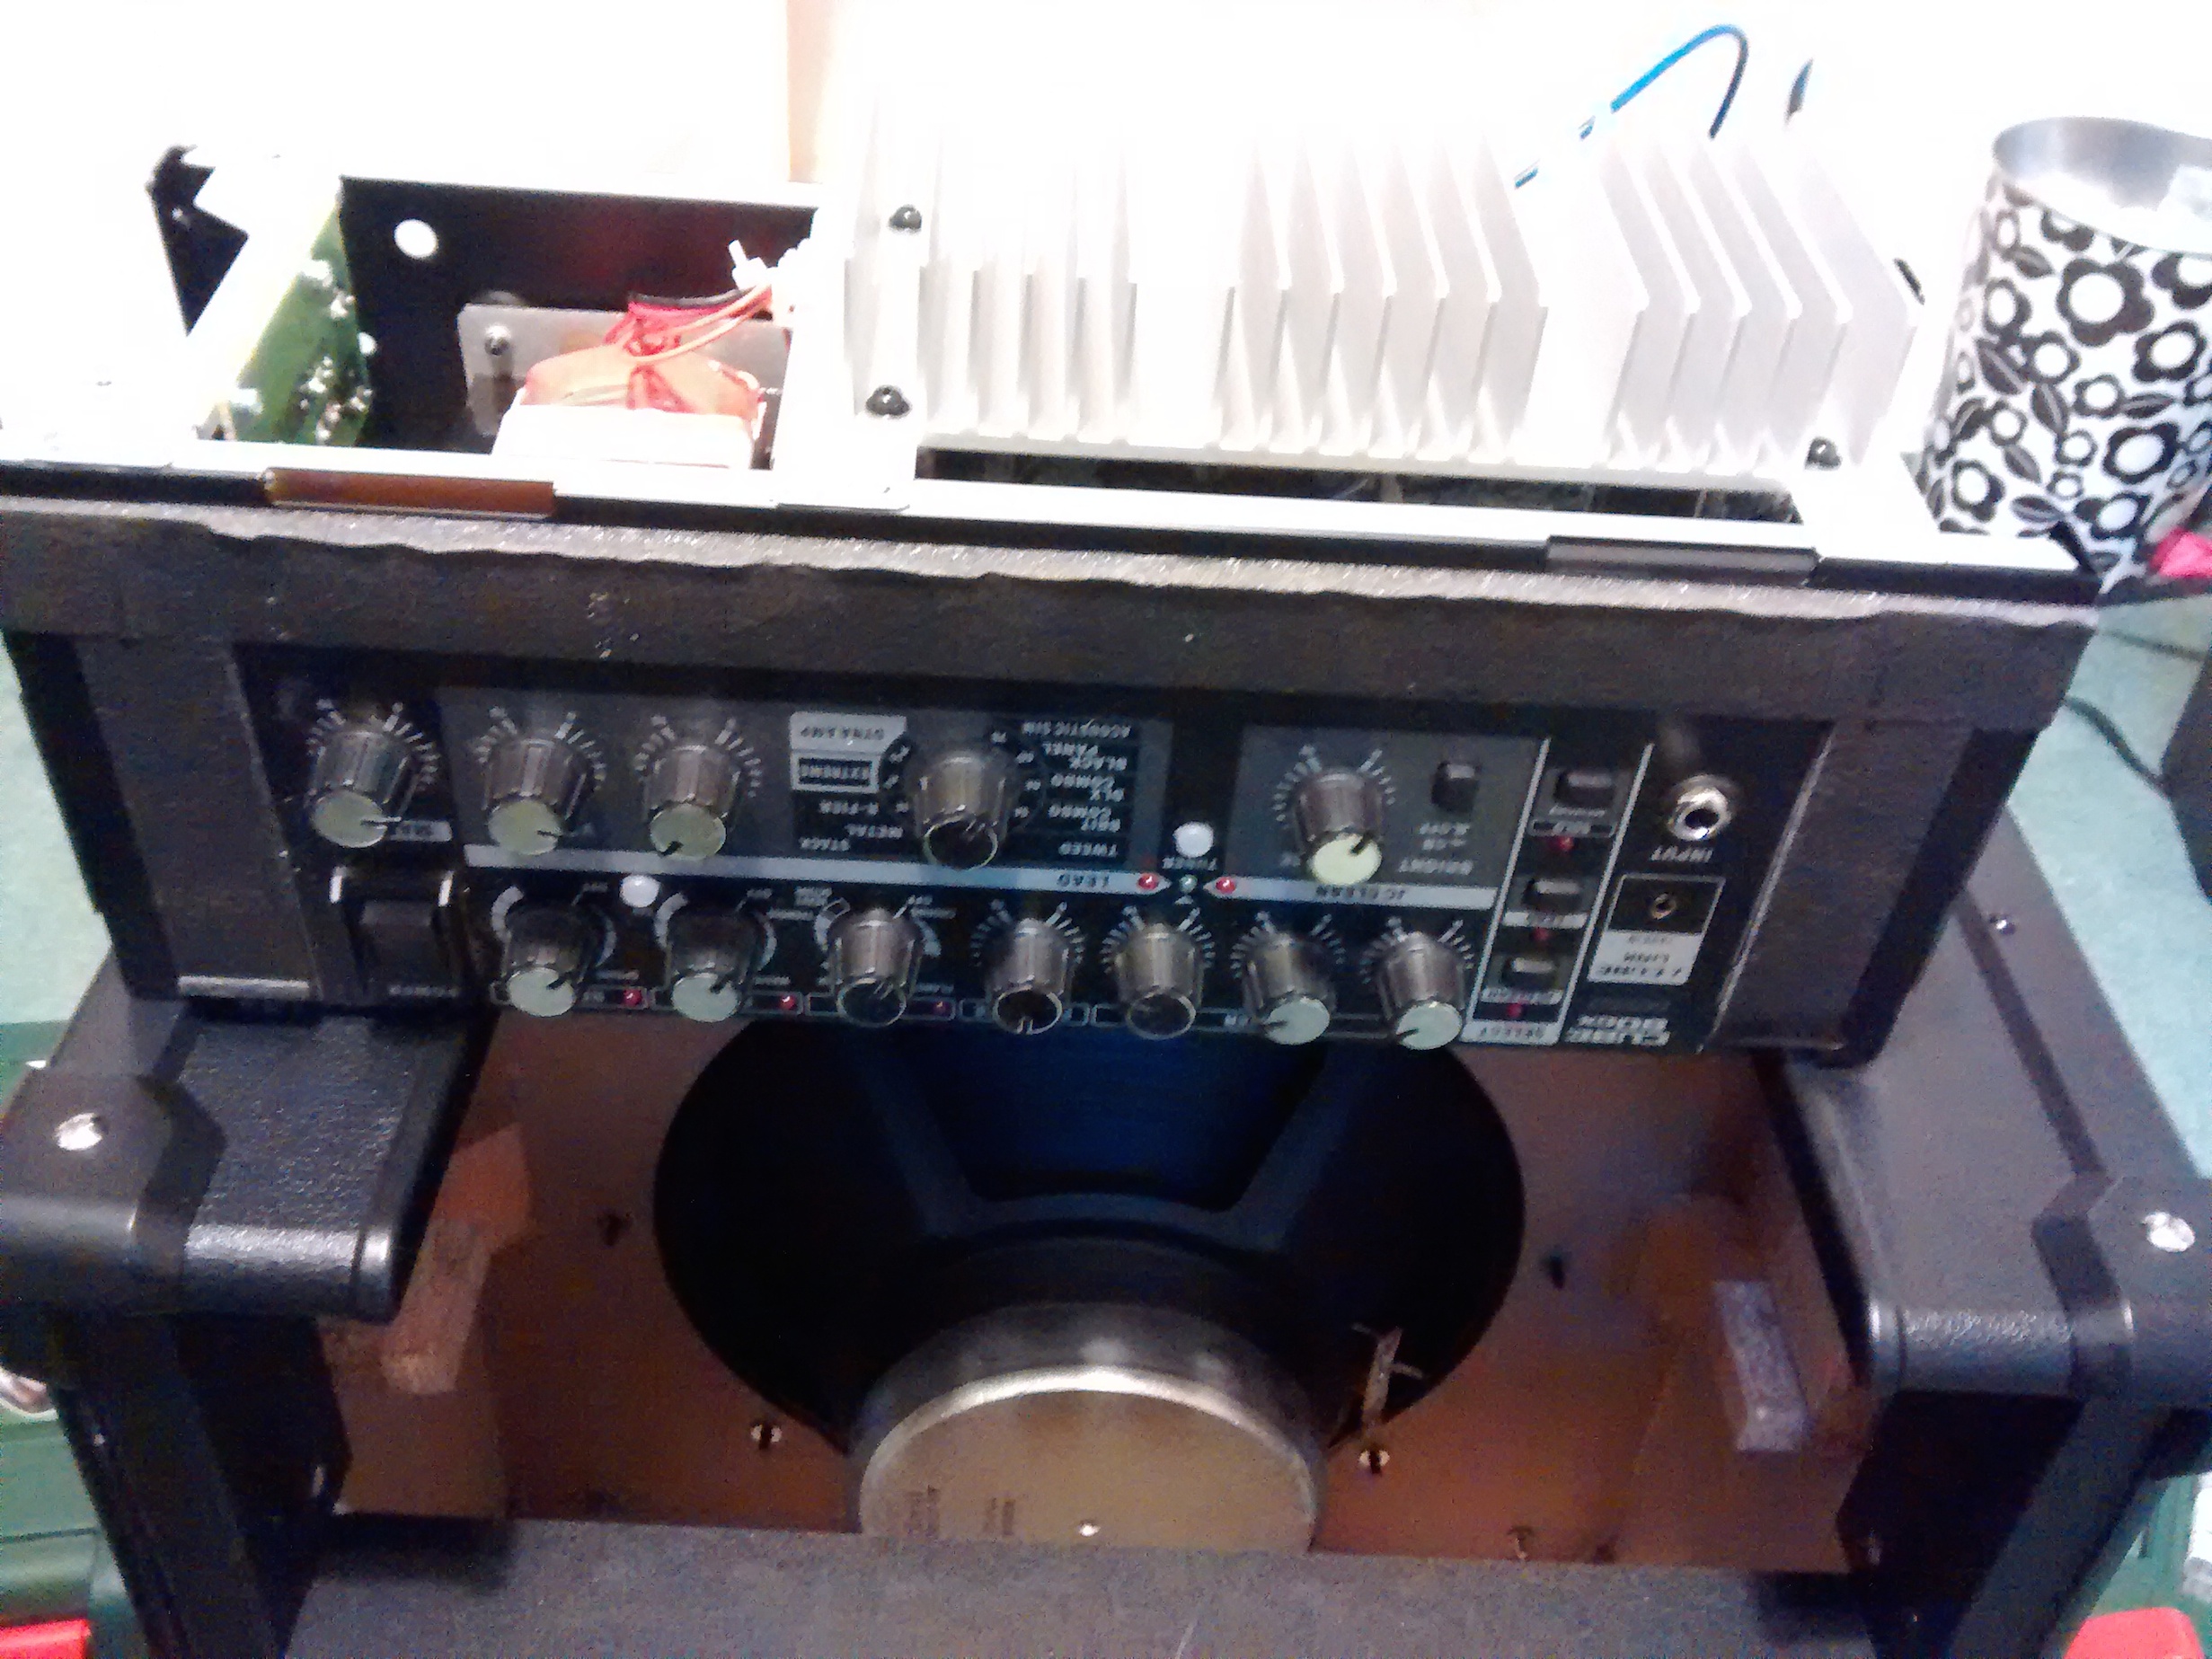
This Roland Cube Repair was a cube 80 from the ever popular Roland Cube range. These amps have a reputation for indestructibility and I’m not surprised. Despite their popularity and the hundreds of amp repair enquiries I receive, I’ve only ever had 3 Roland repair enquiries! Two were from the Roland Cube range, of which this is one. You’ve probably also seen the Anderton’s videos in which they set a Micro Cube on fire and shoot it at the local archery range! It survives the archery and the electronics survives the inferno (the paper speaker cone burns of course)!
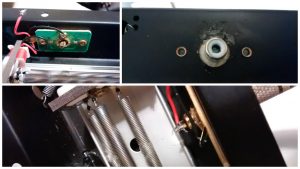
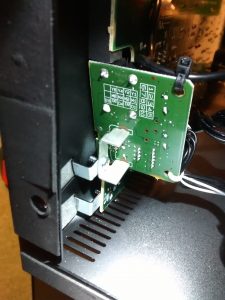
But this one is not even really a faulty amp. The owner had used a cheap balanced jack as a guitar cable. Unfortunately the cable plug had disintegrated inside the amplifier, leaving a jack tip inside the input socket.
It was a relatively simple job to remove the rogue part, but I got an opportunity to admire the rigid construction of the amp whilst doing it.
If you have a Roland Cube repair you’re unusual(!), but please get in touch and I’ll get it sorted for you.
This Fender Mustang Repair Internal was a fiddly job, but quickly completed. Unlike many of the expensive and vintage fender valve amps that I often get in for repair, low cost amps like the Fender Mustang, whilst they represent good value for money, must be completed quickly in order for them to be economical for the customer.
This Fender Mustang had fallen foul of an incident involving the customer’s wife, some headphones and the hoover! The amp’s headphone jack was damaged and rendered unusable. As the sockets are quite flimsy, the cusomer asked me to ‘upgrade’ the Aux in at the same time.
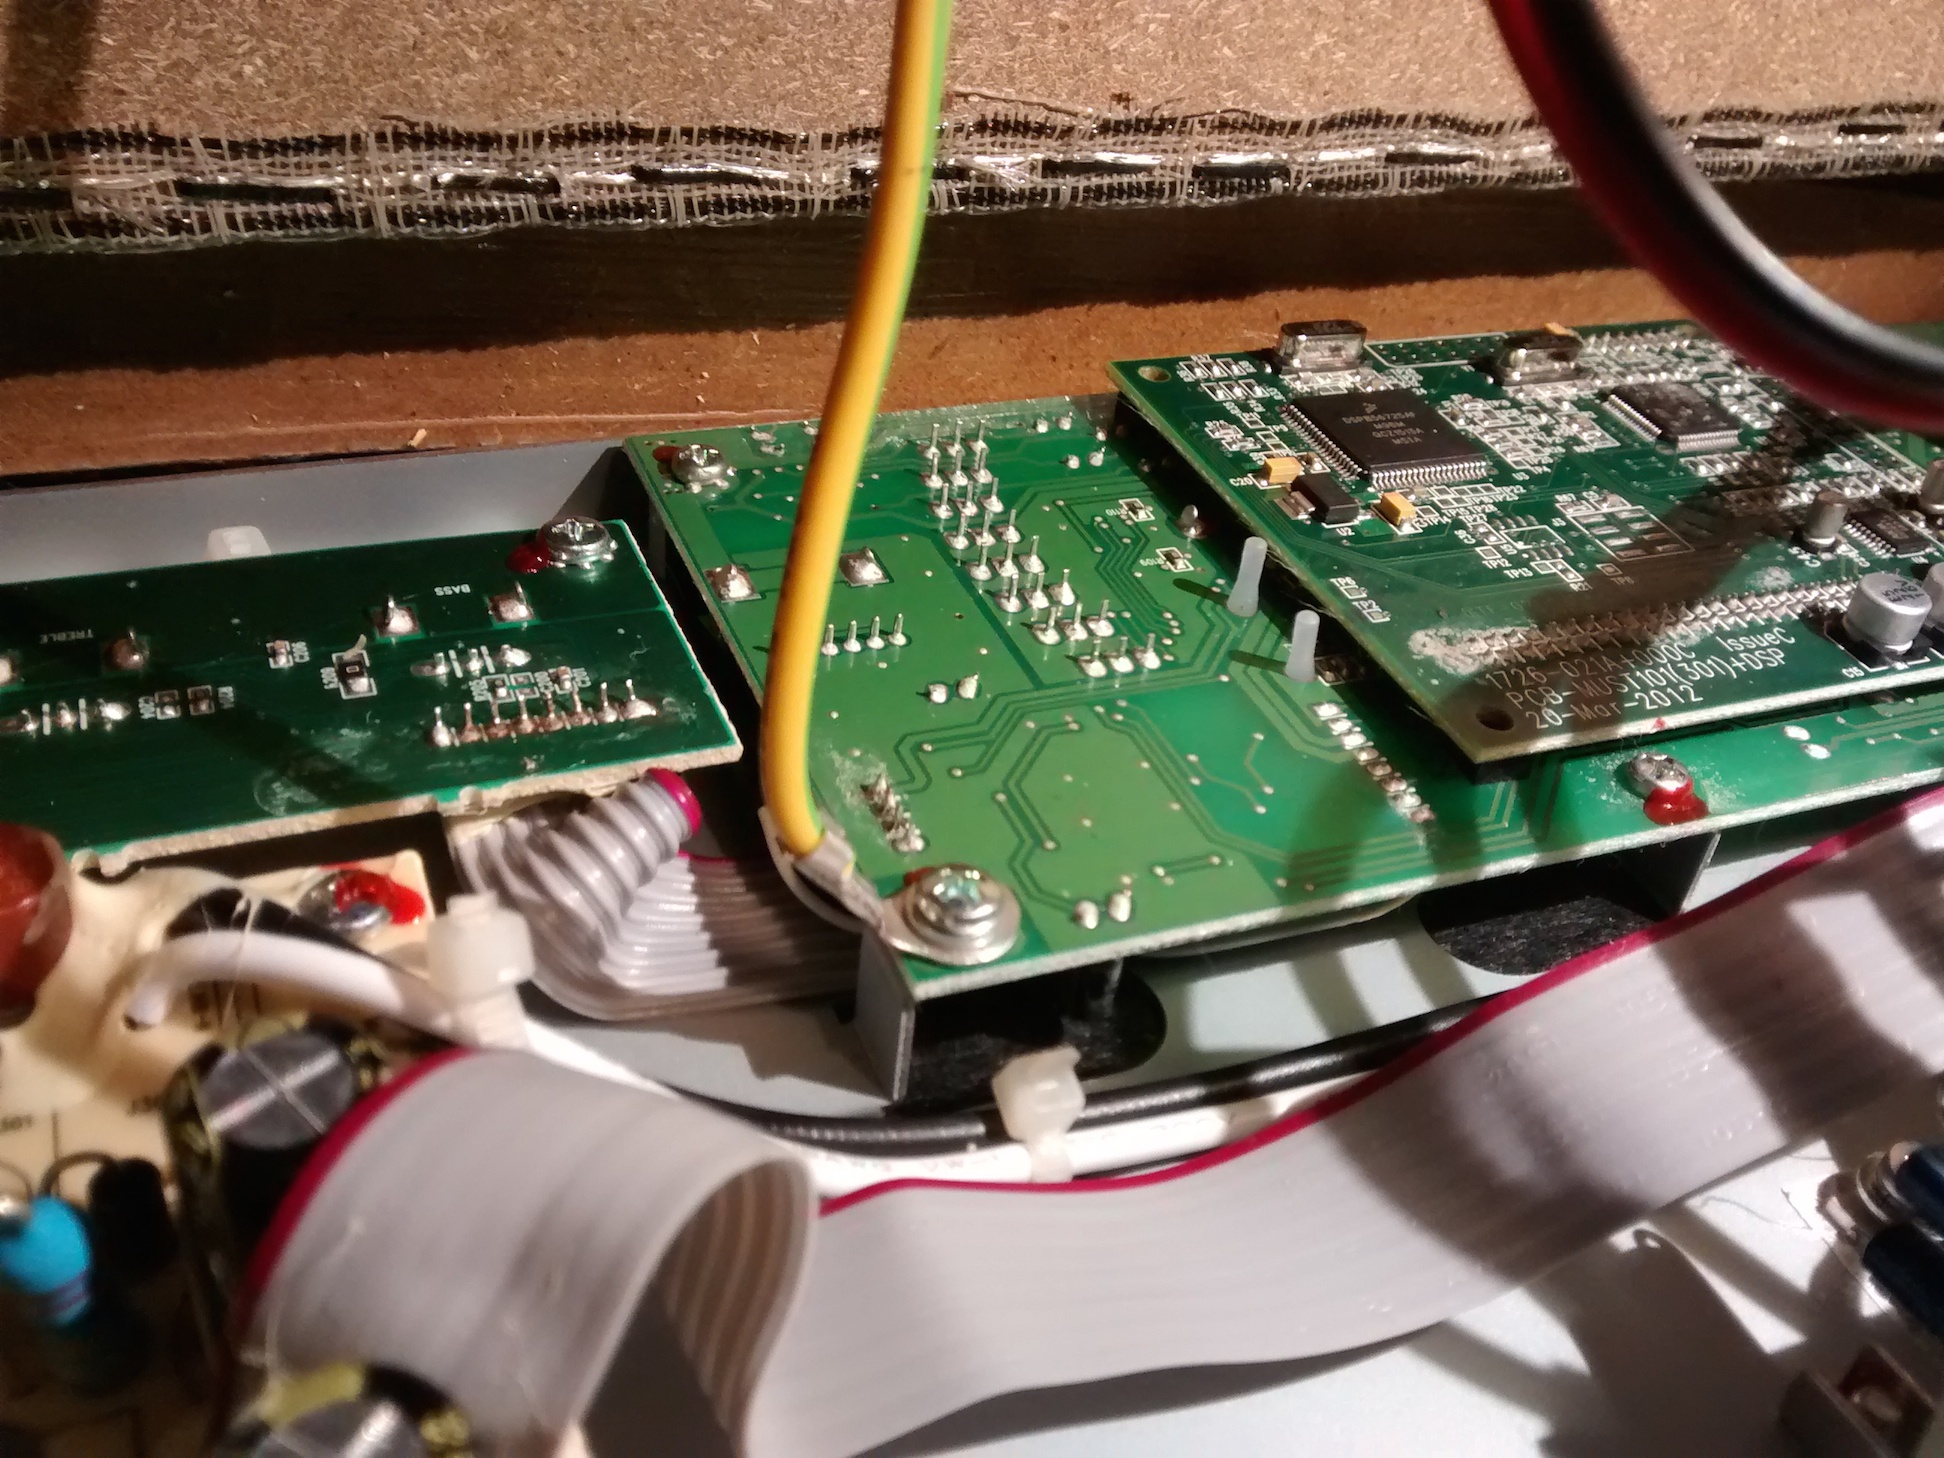
Replacing jack sockets is an easy job on many amps, but this one was a little fiddly. Because of the small size of the amp, the replacement socket had to not only be sturdier than the original, but also less than 9mm long! It took a bit of searching but I was able to find one to allow me to complete the Fender Mustang repair.
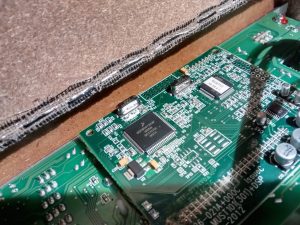
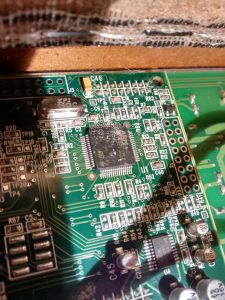
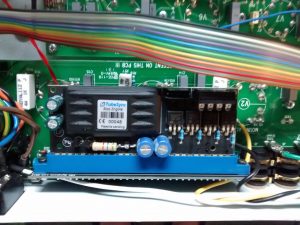
Whilst inside, I took a few photos of the ‘brains’ of the unit, a Freescale DSP and an ARM microcontroller.
This Orange AD30R Repair came in semi-urgently for a full service. The customer had a gig with his band at the Bodega in Nottingham on the thursday and he brought me the amp on Monday night. I do offer an urgent 24 hour turnaround service but fortunately the customer didn’t need that, just a 48 hour turnaround!
After testing all the valves in my valve tester, I determined that the EL84s in the output stage were mismatched. It’s important to match output stage valves to ensure continued good amp health and reliable tone. Fortunately I hold stock of EL84 valves so it didn’t delay the service.
I confess I’ve had to use an Orange AD30R image from Google because I forgot to take a photo!
If you have a Orange AD30R Repair, please let me know and I’ll take a look!
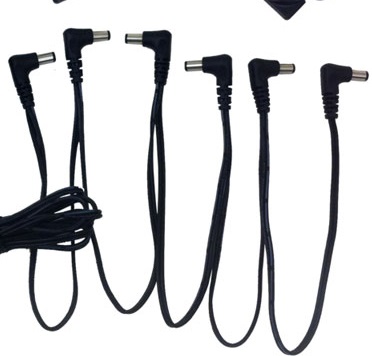
Here’s another MXR carbon copy repair – this one had been damaged by the use of the wrong power supply. I’ve repaired quite a few of these Carbon Copy pedals – the older ones are prone to an ESD related fault that’s quite easily fixed. This is the first carbon copy I’ve seen since MXR implemented the ESD fix on their production line. They use the exact same methods that I’ve been using since first discussing the repairs with MXR in 2013.
In this case, the owner had mistakenly plugged the pedal into the wrong power supply. This pulled a very high current into the pedal and burned out some components. Fortunately I had the parts in stock and was quickly able to fix the pedal with only a small cost to the customer. Whilst I don’t recommend plugging the wrong power supply into a pedal, it’s rarely a death sentence!
If you’ve plugged the wrong power supply into your pedal, don’t panic. Just drop me a line!.
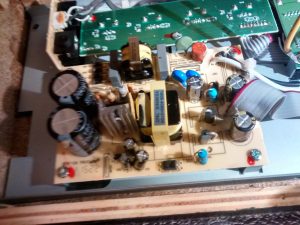
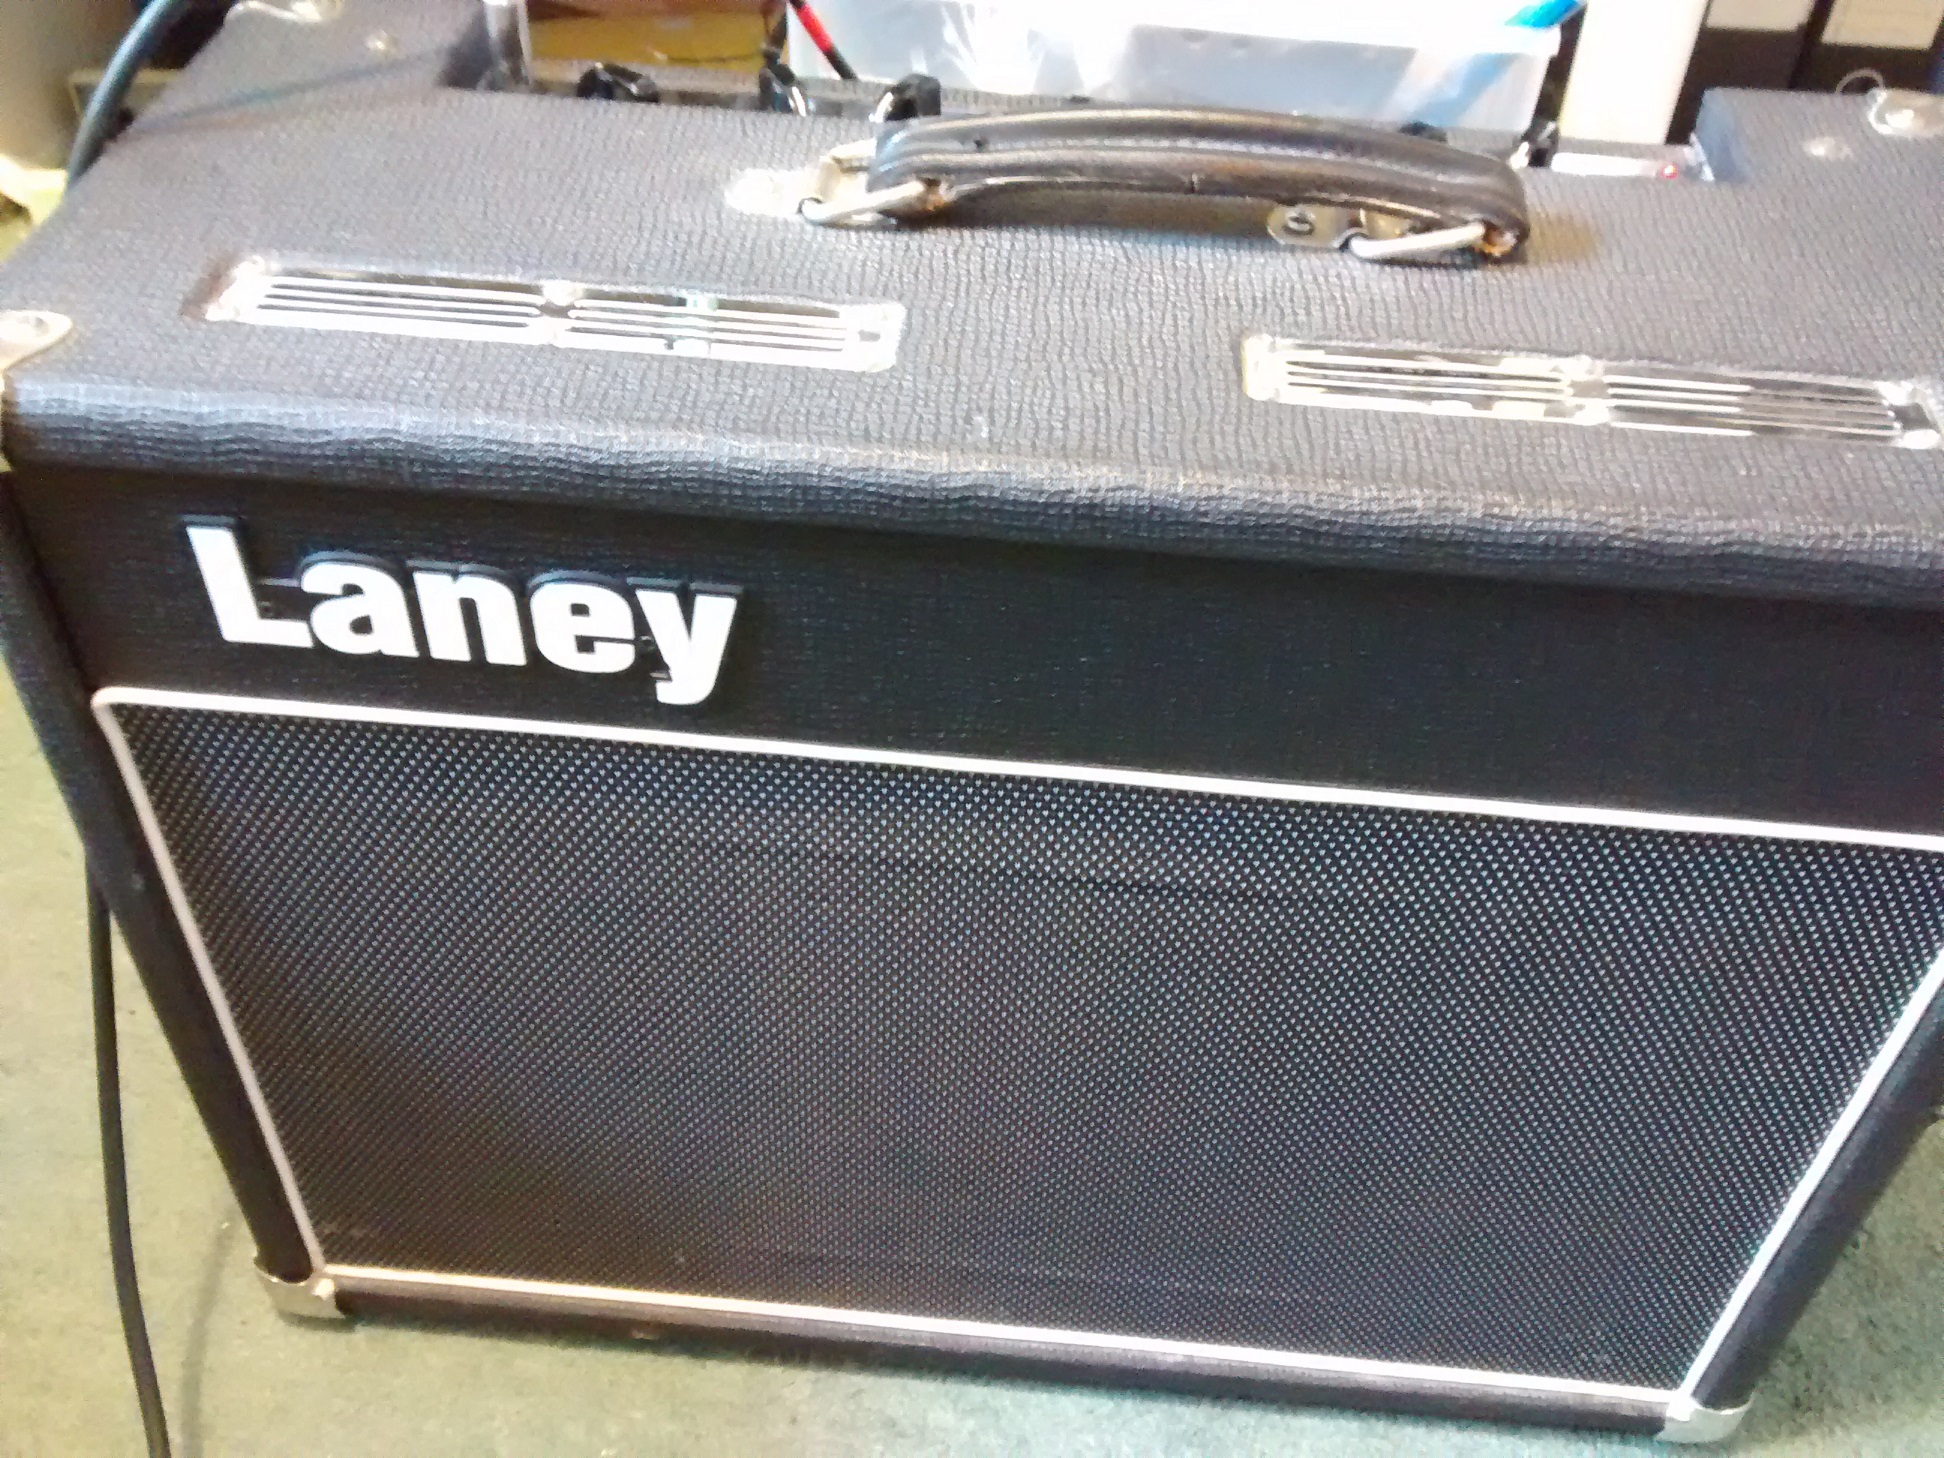
This Laney speaker change job came down from York last week. The Laney VC30s are great amps but sadly are supplied with quite bland speakers. My customer asked me to fit a Celestion V30 to replace the stock HH driver.
It’s owned by a professional guitarist who bought it as a spare – unfortunately the amp also had a bad case of ‘snap, crackle and pop’ so whilst en route to gig he brought it to me for investigation and a speaker change.
The speaker change was a success. Because I’ve had experience of microphonic howls in Laney amps, I was initially concerned about the V30’s greater magnet size and proximity to the valves, but this turned out to work well. You can hear the results of the speaker change below, a great improvement!
In another Laney speaker change, I had good results with an Eminence Legend, I’m afraid the audio isn’t as good on this one!
The crackling issue turned out to be the phase inverter valve, one if two 12AX7s which failed in my valve tester.
If you have a Laney VC30 speaker change or repair, drop me a message and we’ll bring your amp to life!
This Orange amp repair is a particularly shocking example of an amp which someone has attempted to repair without really having an understanding of what they’re doing. The customer brought it to me with two issues: a broken reverb (victim of the botched repair) and an intermittently faulty gain channel.
I started out by performing a basic valve amp service upon the amplifier. This involves testing all the valves with my valve tester. 3 preamp valves were found to be faulty: this proved to be the cause of the gain channel dropout. This Orange amp repair didn’t require checking of the bias of the amp, because the Rockerverb MK II has Orange’s proprietary ‘DIVO’ power valve management, meaning that the amp biases itself. It’s the only system that I’m aware of that doesn’t require matched valves in the output stage, so when one of the EL34s was found to have a snapped key on its base, I installed a 6L6GC in its place! I also fixed the snapped key so it could be used.
Turning my attention to the spring reverb repair, I noted that one of the phono cables had a broken connection. The connectors had been made up without any strain relief and this had allowed damage to happen during normal use. This is an easy fix and after fixing the broken connection I resoldered the other reverb intact connector so that both had adequate strain relief.
Upon testing the faulty spring reverb I discovered that it still wasn’t fixed so I turned my attention to the unit itself. Worryingly, one of the sockets was surrounded with glue on the outside. When I opened it up I realised that some fool(!) had tried to fix the loose socket by flooding it with superglue. Worse, as you can see in the picture the glue had dripped inside the unit and fouled the springs quite badly.
I was able to remove the superglue, but they remained quite distended. The unit still works as a reverb so my customer decided not to have me replace the tank.
If you’ve got an Orange Amp repair or a spring reverb repair, please don’t bodge it, just get in touch!
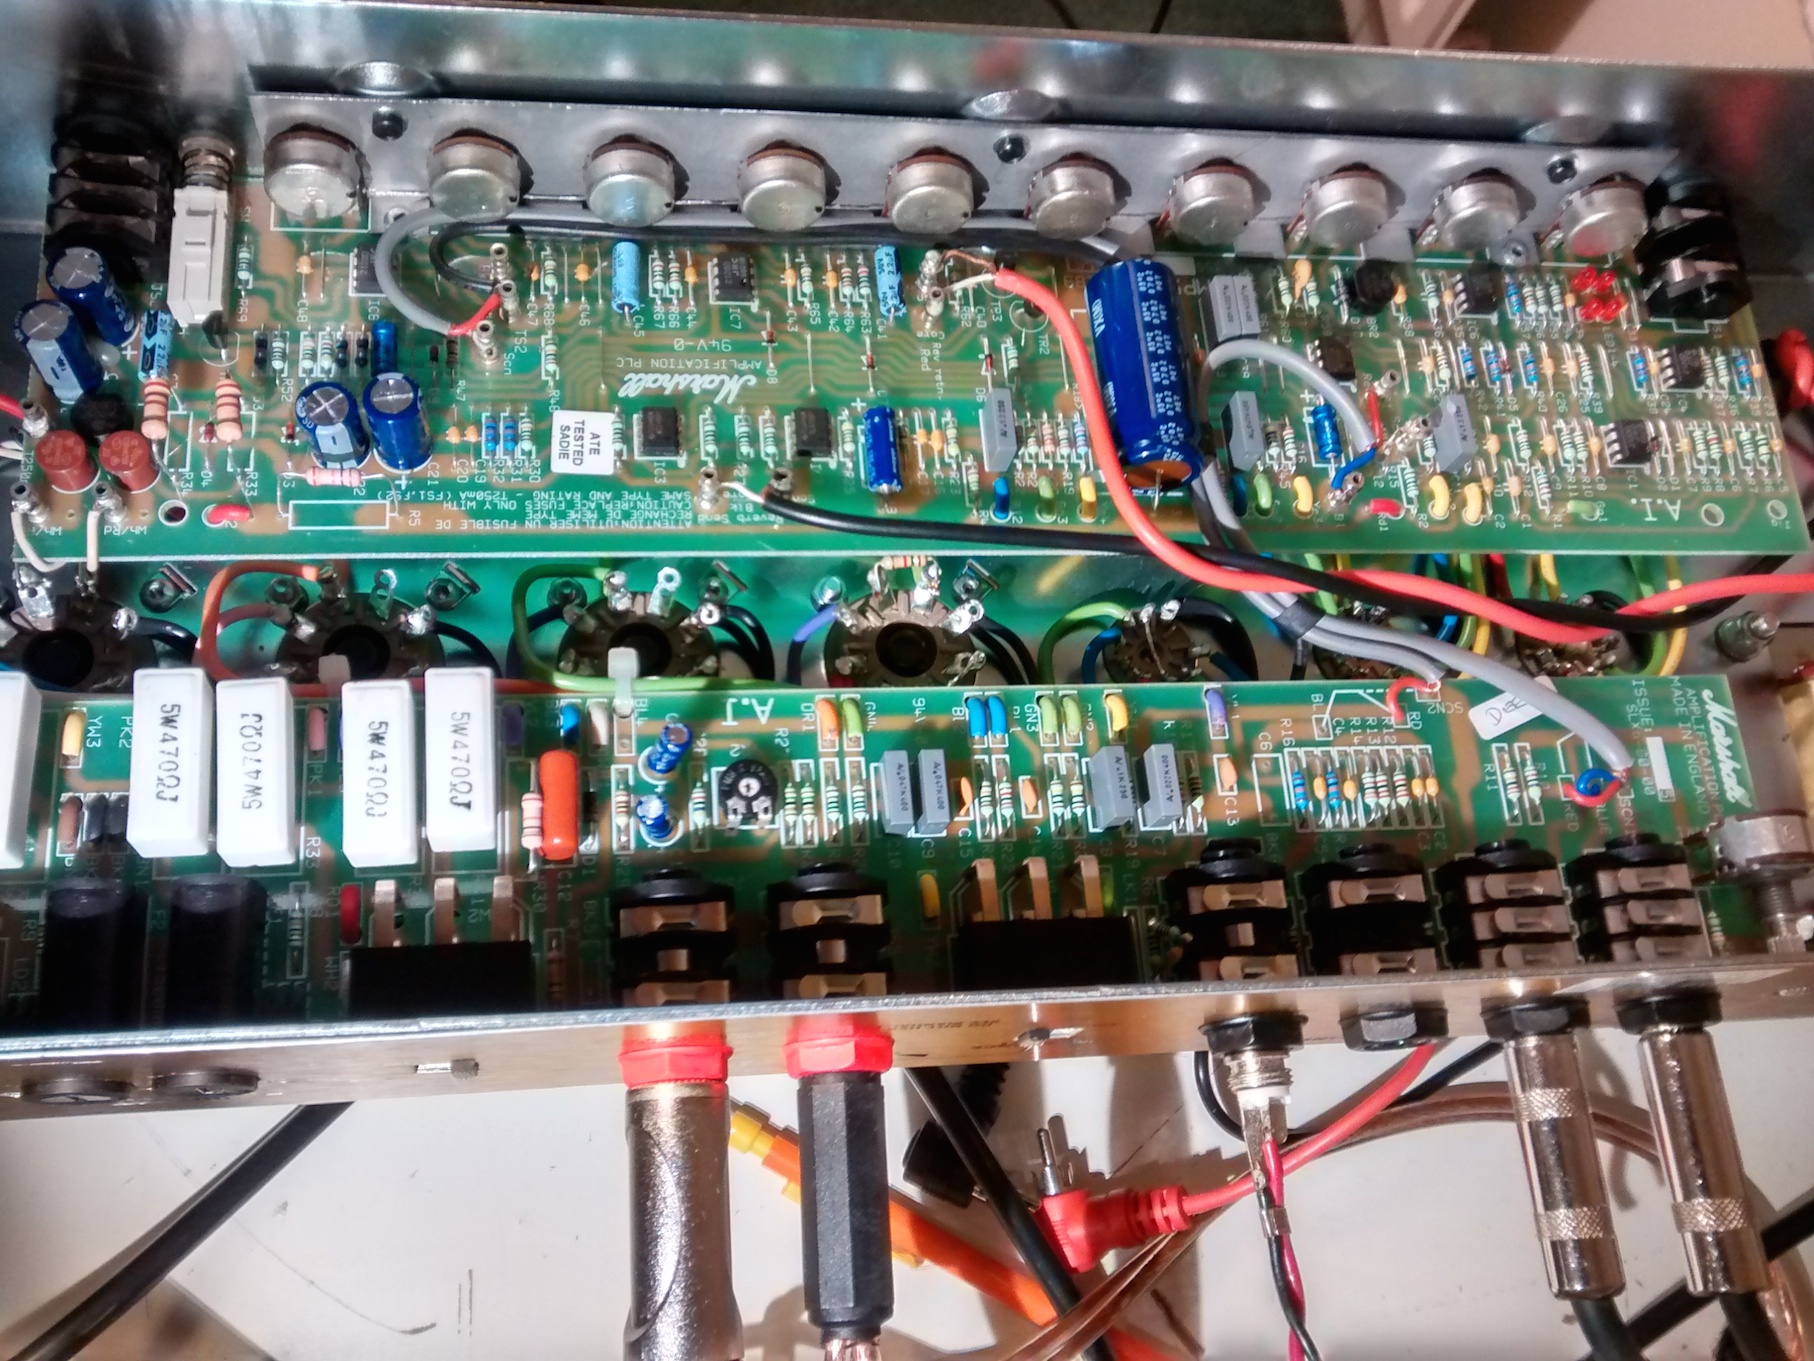
This JCM900 repair arrived after the owner found that it was lacking in volume.
It’s a 2009 unit, two channel, with a 2203 type circuit on channel A and a higher gain circuit on channel B.
The problem appears to have been with the amplifier bias. Although the valves were matched, the bias on this JCM900 repair was set very high. The bias set the dissipation at about 95% – Marshall suggest about 70%. This causes the output to compress much earlier than would otherwise occur. Fortunately this is easy to fix.
I then offered to soak test the amp which is a means of testing the amp in the conditions it would be in rehearsal or gig. This is great for revealing those hard to find problems that would otherwise missed. It revealed a minor fault with the preamp – a crackle appeared behind the note transients. Since this was a relatively minor problem, the owner chose not to have it looked into.
I sometimes have been known to complain that some amp manufacturers give little thought to ease of repair – mesa boogie have had some stick from me in other reports. Some marshall repairs – thinking the DSL range in particular – are a bit difficult because of their complexity but this JCM900 repair is a delight to work on. They’ve really thought things through both in terms of reliability and ease of repair. It’s probably the easiest channel switching amp to repair that I’ve seen.
Although the channel A had a great plexi type tone, the owner isn’t a big fan of the Drive sound in ChannelB – he’s thinking of modding the amp to acheive the fabled Silver Jubilee tone so stay tuned – this one might turn up again.
If you have a JCM900 repair, please do get in touch.
Now, is it good things or bad things that come in threes? It must be good things. This was the third of three vintage vox ac30 repairs that came to me over a few weeks in summer 2015. Vintage amps have a particular smell and when there are 3 vintage vox amps in the workshop for repair you soon become very used to it!
This amp is probably the toughest repair job that I’ve worked on over the last 6 years. Another repair company in Lincolnshire, experienced with vintage amp repairs, had looked at the amp but had ultimately had to give up. I don’t really blame them.
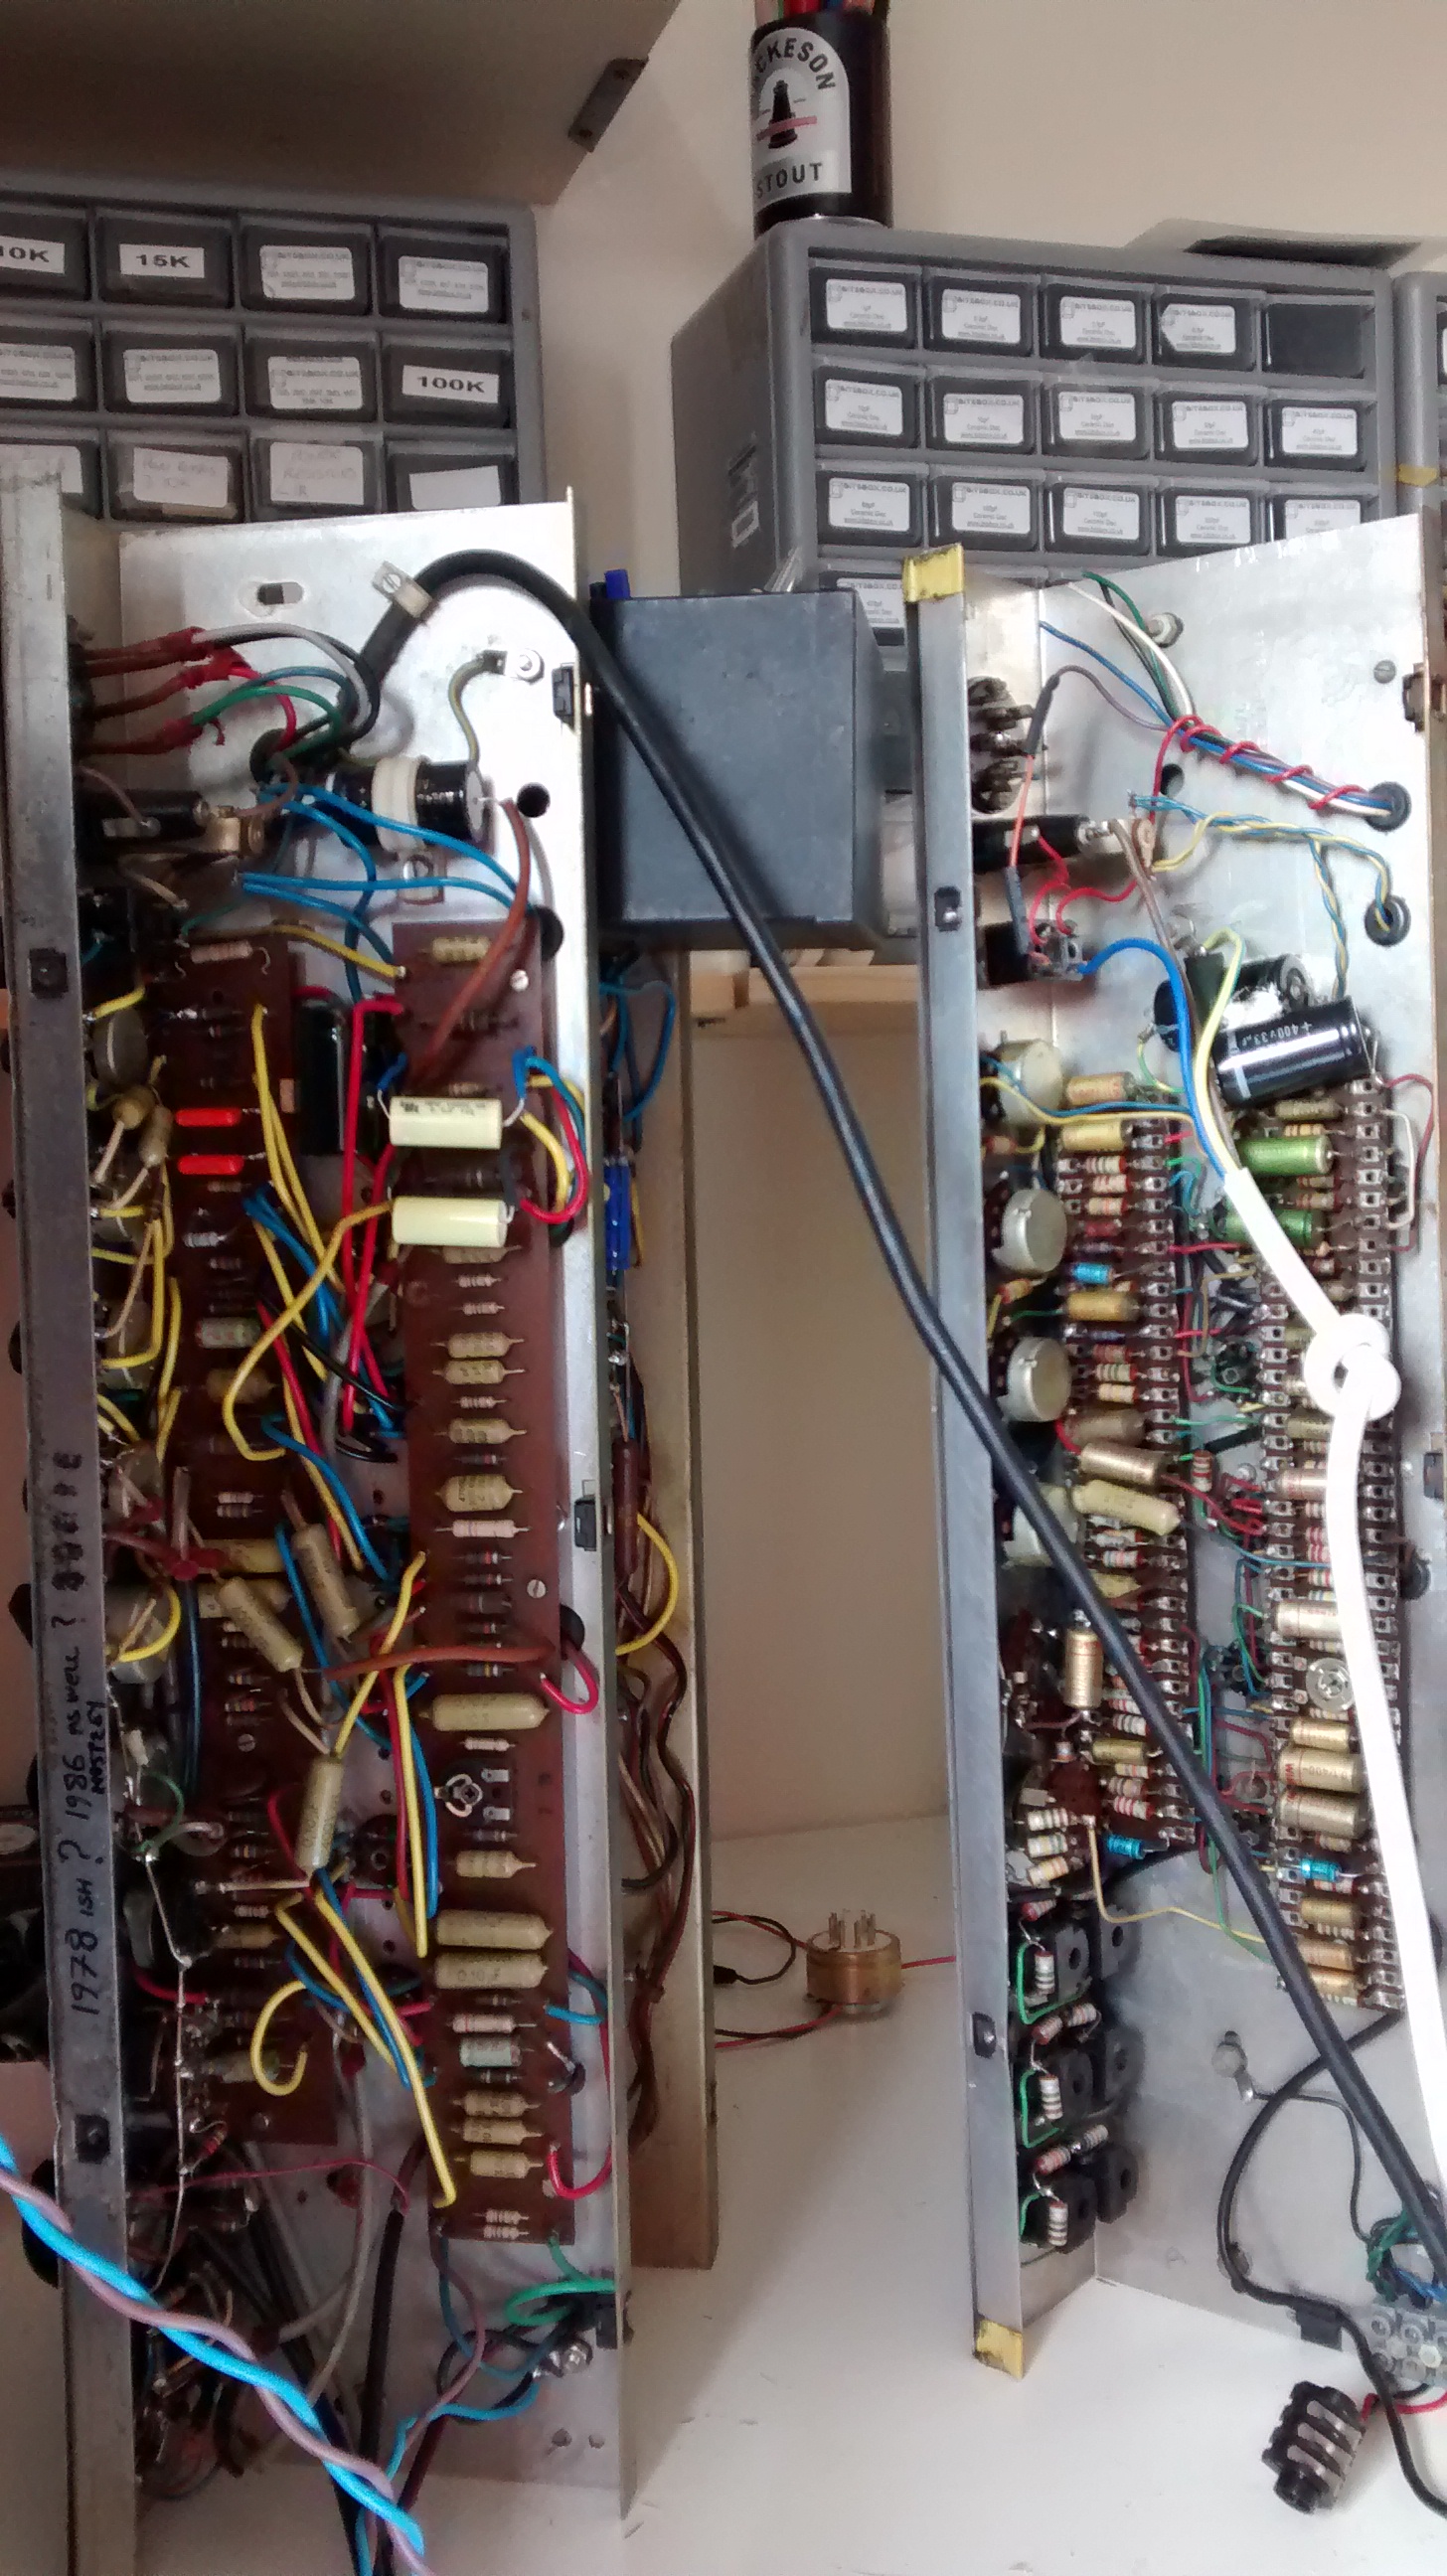
This vintage Vox AC30 (there’s a picture of it on the 1961 vox page too) is I think a 1970s model. I’ve estimated it at 1973, with substantial modifications through the years. However, I’m an electronics geek, not an amp history geek, so I may be wrong. Someone who’s opened up the amp in the past has written “1978 ish ? 1986 as well, mostly ?” inside it. I judge it to be 1973 because the vox logo is a traditional VOX logo as used in the 60’s, but this could have been swapped during it’s lifetime. Early 1970s vintage Vox AC30s used PCBs too. STragely, this doesn’t look like any of the 70’s PCBs that I could find. So, the jury’s out on this one!
Some 70s vintage Vox AC30s came with reverb circuits, but this amp uses a solid state reverb circuit that I can’t find any record of in 70s amps. You can tell that the amp didn’t ever have a valve reverb because it’s a 10 valve unit. The ’78 reverb unit used 11 valves with the extra triode used to buffer the signal into the spring reverb and to make up gain after it. But the amp had a reverb market on the front panel, I assume this must have been fitted later.
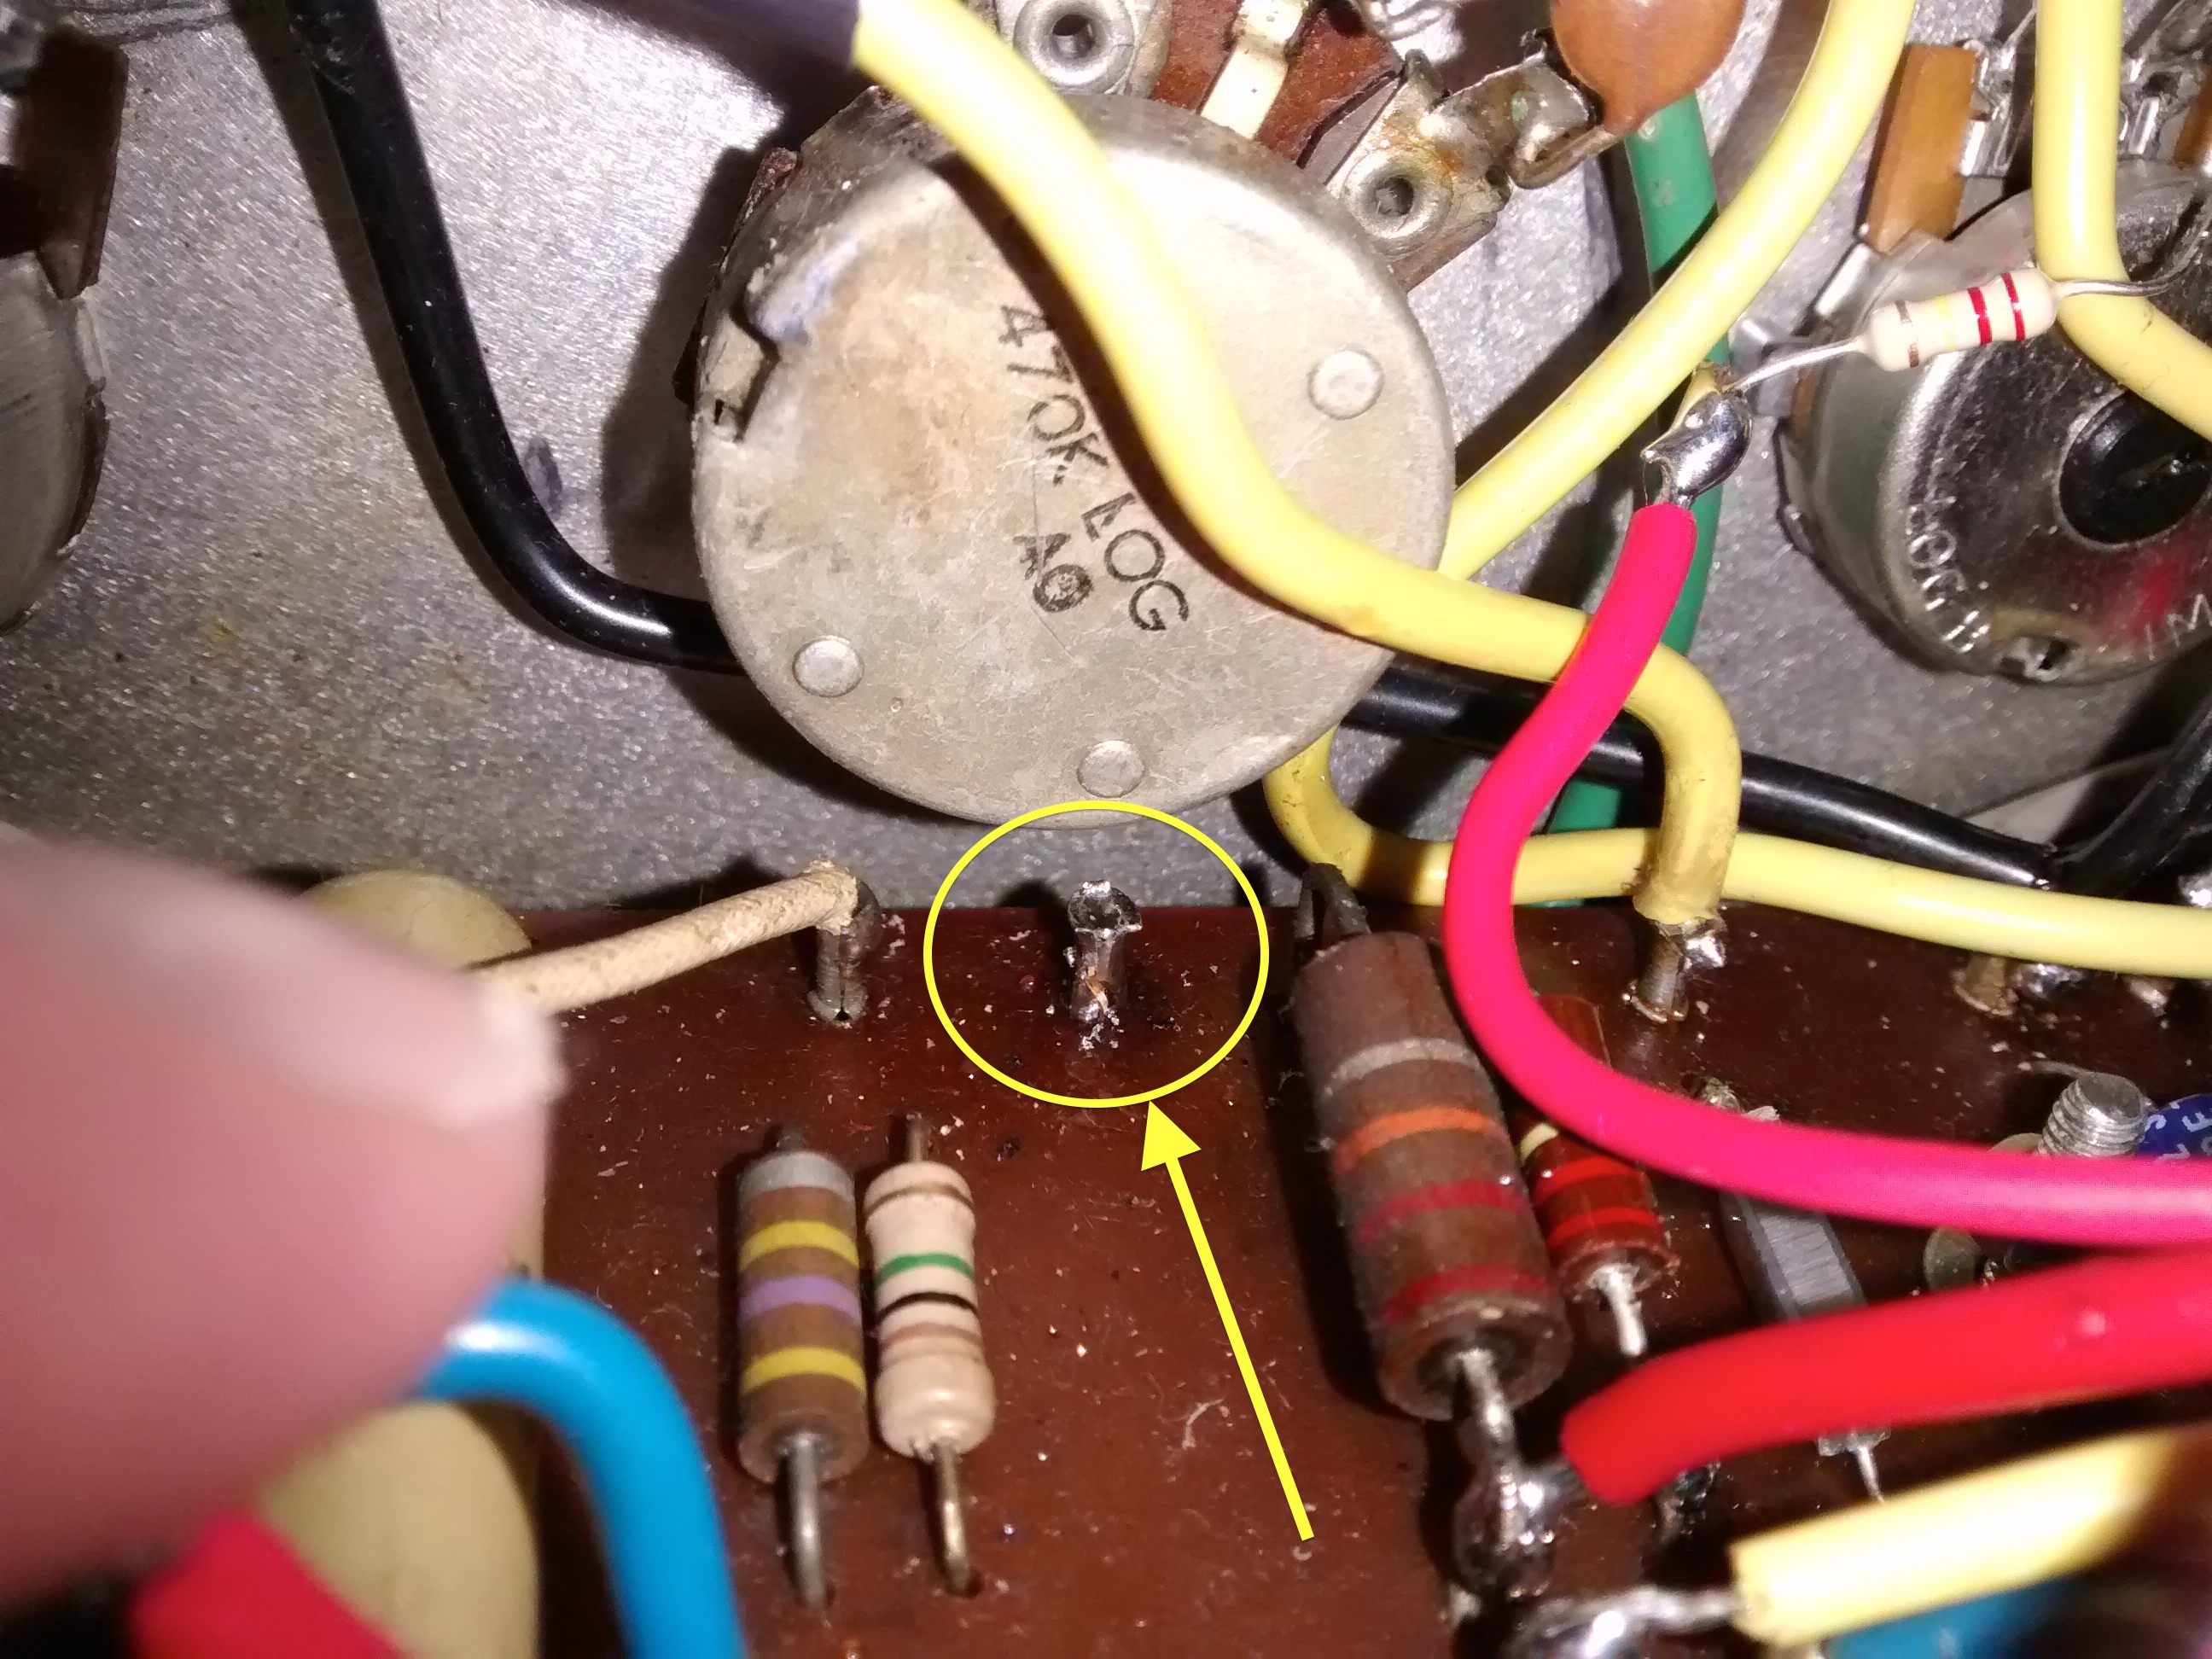
I’ve spoken before of the peculiarities of doing amp repairs on guitar amps and other electronics is that the actual process of repairing can take just 5 minutes, but the fault replication and diagnostic period is often much much longer. This problem is made worse in situations when the problem disappears intermittently. This one would disappear as the amp warmed up, after 20min or so.
The fault turned out to be a loose turret connection between the normal preamp volume control and the phase inverter. The connection appeared to be physically intact with a good solder joint. Grounding the point through the pot appeared to have no effect. However when removing this turret it broke in two. There must have been solder holding the piece together, but not making a reliable connection.
After that was fixed, we decided to wire out the solid state reverb unit and return the unit to vintage AC30 spec by adding back in the LoGain input on the vintage channel. While doing this I noticed that someone who’d worked on the amp, probably whoever fitted the reverb had wired up the input jack wrongly, leaving the brilliant channel jack socket with a high resistance to ground at all times. This turned the unit into a pickup point and the amp was feeding back on its own at high treble settings, with no guitar plugged in. Nightmare! Anyway this was soon fixed.
When finished, this is easily one of the nicest sounding amps I’ve ever played. I love the way the Vintage Vox AC30 circuit distorts. It’s easy to see why it’s become a popular circuit for the likes of Dr Z, Trainwreck, Matchless, Bruno etc. to copy. You can see a bit of it in the quick video I did to celebrate it’s finish!
This vintage vox AC30 repair took a good deal of effort, and I was the second repairer to work on it, bit I’m glad to say that it is now fixed. If b you have a vintage vox AC30 and it’s in need of a bit of TLC, please so contact me via the contact page.
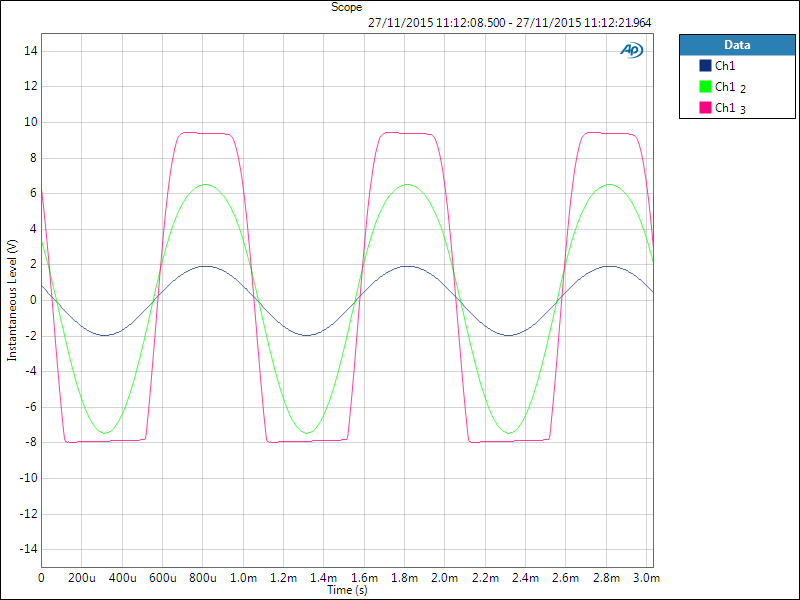
No fault found with this Art tube mic preamp repair, however I did get a chance to do some interesting tests on the unit’s distortion characteristics.
The first picture shows the unit distorting with signals at three different input levels. The Blue trace is basically clean. Part of the valve ‘sound’ is that Valves clip the ‘top’ and ‘bottom’ of the waveform in different ways. Positive excursions are clipped at the input by grid current limiting, while negative excursions are clipped by the output cutoff against the rails, potentially leading to an uneven waveform. This can be seen in the green trace, in which one part of the waveform is rounded off (‘soft clipped’. The Art preamp clipping LED glows orange when valves are clipping. In the pink trace the unit heavily slipped on both top and bottom of the waveform. The clipping is slightly more symmetrical, although it can be seen that one side is’softer’ than the other. The clip light goes red in this condition.
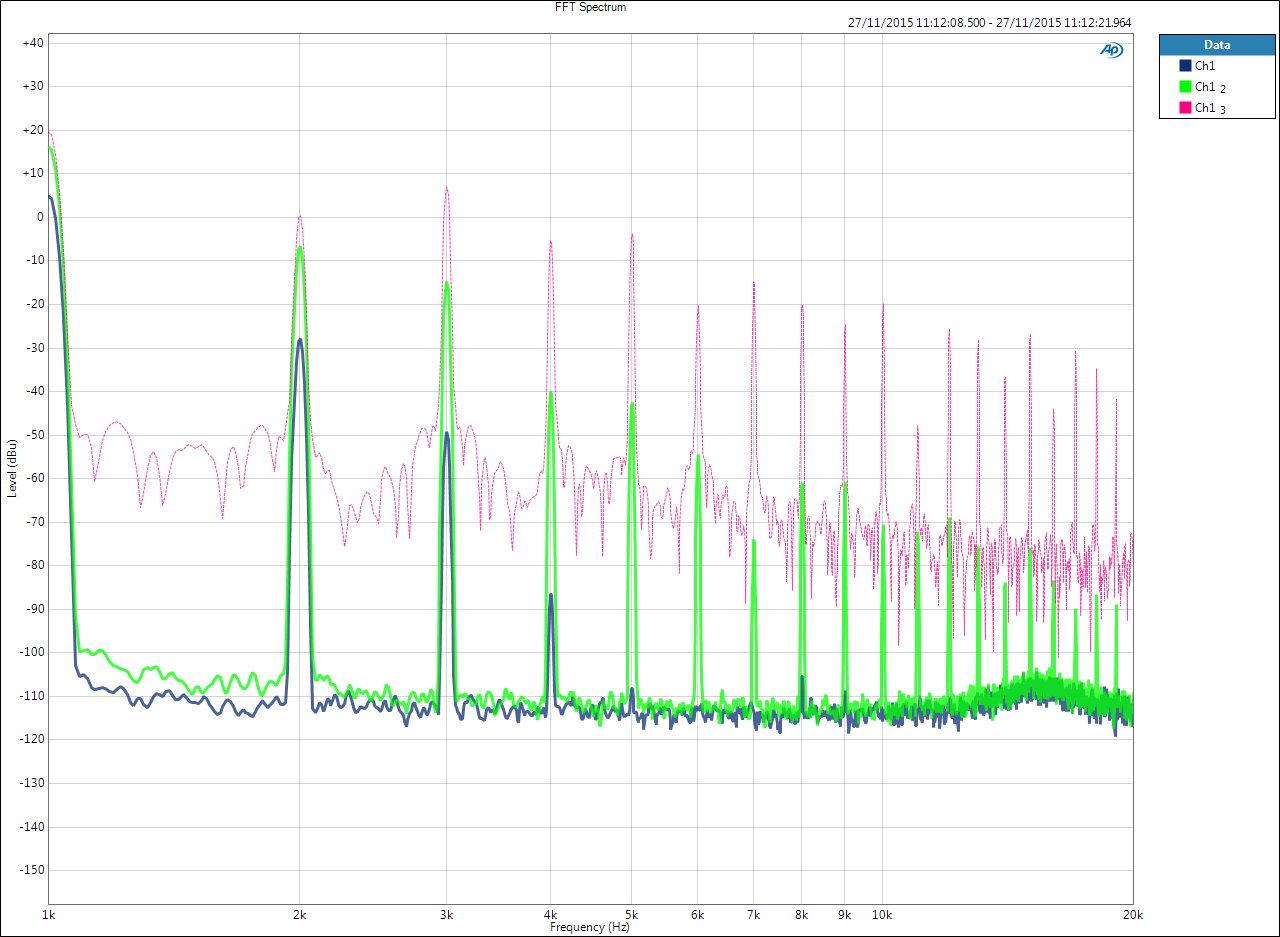
The second graphic shows the changes in the harmonics created by the clipping. The uneven clipping tends to emphasise even order harmonics, with 2nd harmonic at 2K being larger than 3K and so on. Confusingly, waveforms that are clipped evenly create more odd harmonics. YOu can see that 3K harmonic is now greater than the 2K, the 5K greater than the 4K etc.
So there you go. If you have a valve preamp repair job that you think I could help with them please do contact me.
Shortly after the Confetti 1962 vintage ac30 repair arrived, this vintage Vox repair turned up on my bench too! The 1961 in the picture is on the right, the left amp is a 1970’s vintage vox, which you can read about here.
This is (as far as I can tell) a 1961 model. It was once covered in a cream vinyl, but the customer (who had it from new!) had decided at some point that it would look cooler in black and painted it.(!)
After laying down his axe many years ago, the customer decided to sell the amp and brought it to me to service.
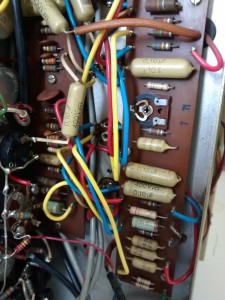
I found that the brilliant channel didn’t work. This turned out to be an out of tolerance resistor in the gain stage and a faulty coupling capacitor. Also the tremelo system wasn’t working. In vintage vox circuits, this consists of 6 triodes worth of analog electronics. 2 are an audio input buffer, 2 create a modulating signal and 2 mix the modulation with the audio signal. The fault was with the modulation circuitry and was again down to a worn out capacitor. This is not an uncommon task in vintage Vox repairs.
As with the Confetti 1962 vintage ac30 repair, I hard wired the mains to 245V for UK operation and replaced the ancient power cord with a modern tri rated mains lead.
I’m pleased to say that the customer was very happy with the vintage vox repair! If you have a Vintage ac30, or a vintage amp in need of repair, please get in touch.


 I started out by performing a basic valve amp service upon the amplifier. This involves testing all the valves with my valve tester. 3 preamp valves were found to be faulty: this proved to be the cause of the gain channel dropout. This Orange amp repair didn’t require checking of the bias of the amp, because the Rockerverb MK II has Orange’s proprietary ‘DIVO’ power valve management, meaning that the amp biases itself. It’s the only system that I’m aware of that doesn’t require matched valves in the output stage, so when one of the EL34s was found to have a snapped key on its base, I installed a 6L6GC in its place! I also fixed the snapped key so it could be used.