Fender Blues Junior Repair – Urgent Repair

Fender Blues Junior Repair

This Fender Blues Junior Repair was an urgent repair job for a London based guitarist. I got the amp at 23:30 on the Saturday after a gig in Southwell near Newark and had it diagnosed by 11:15 the next morning before he returned to the ‘big smoke’.

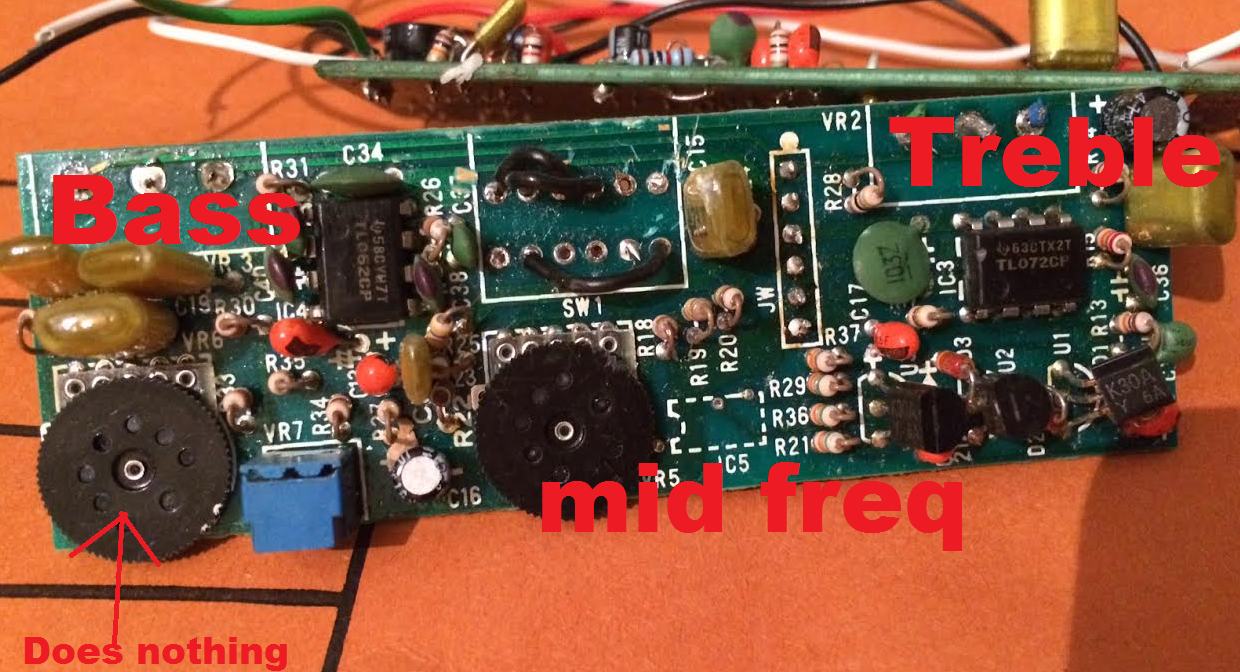
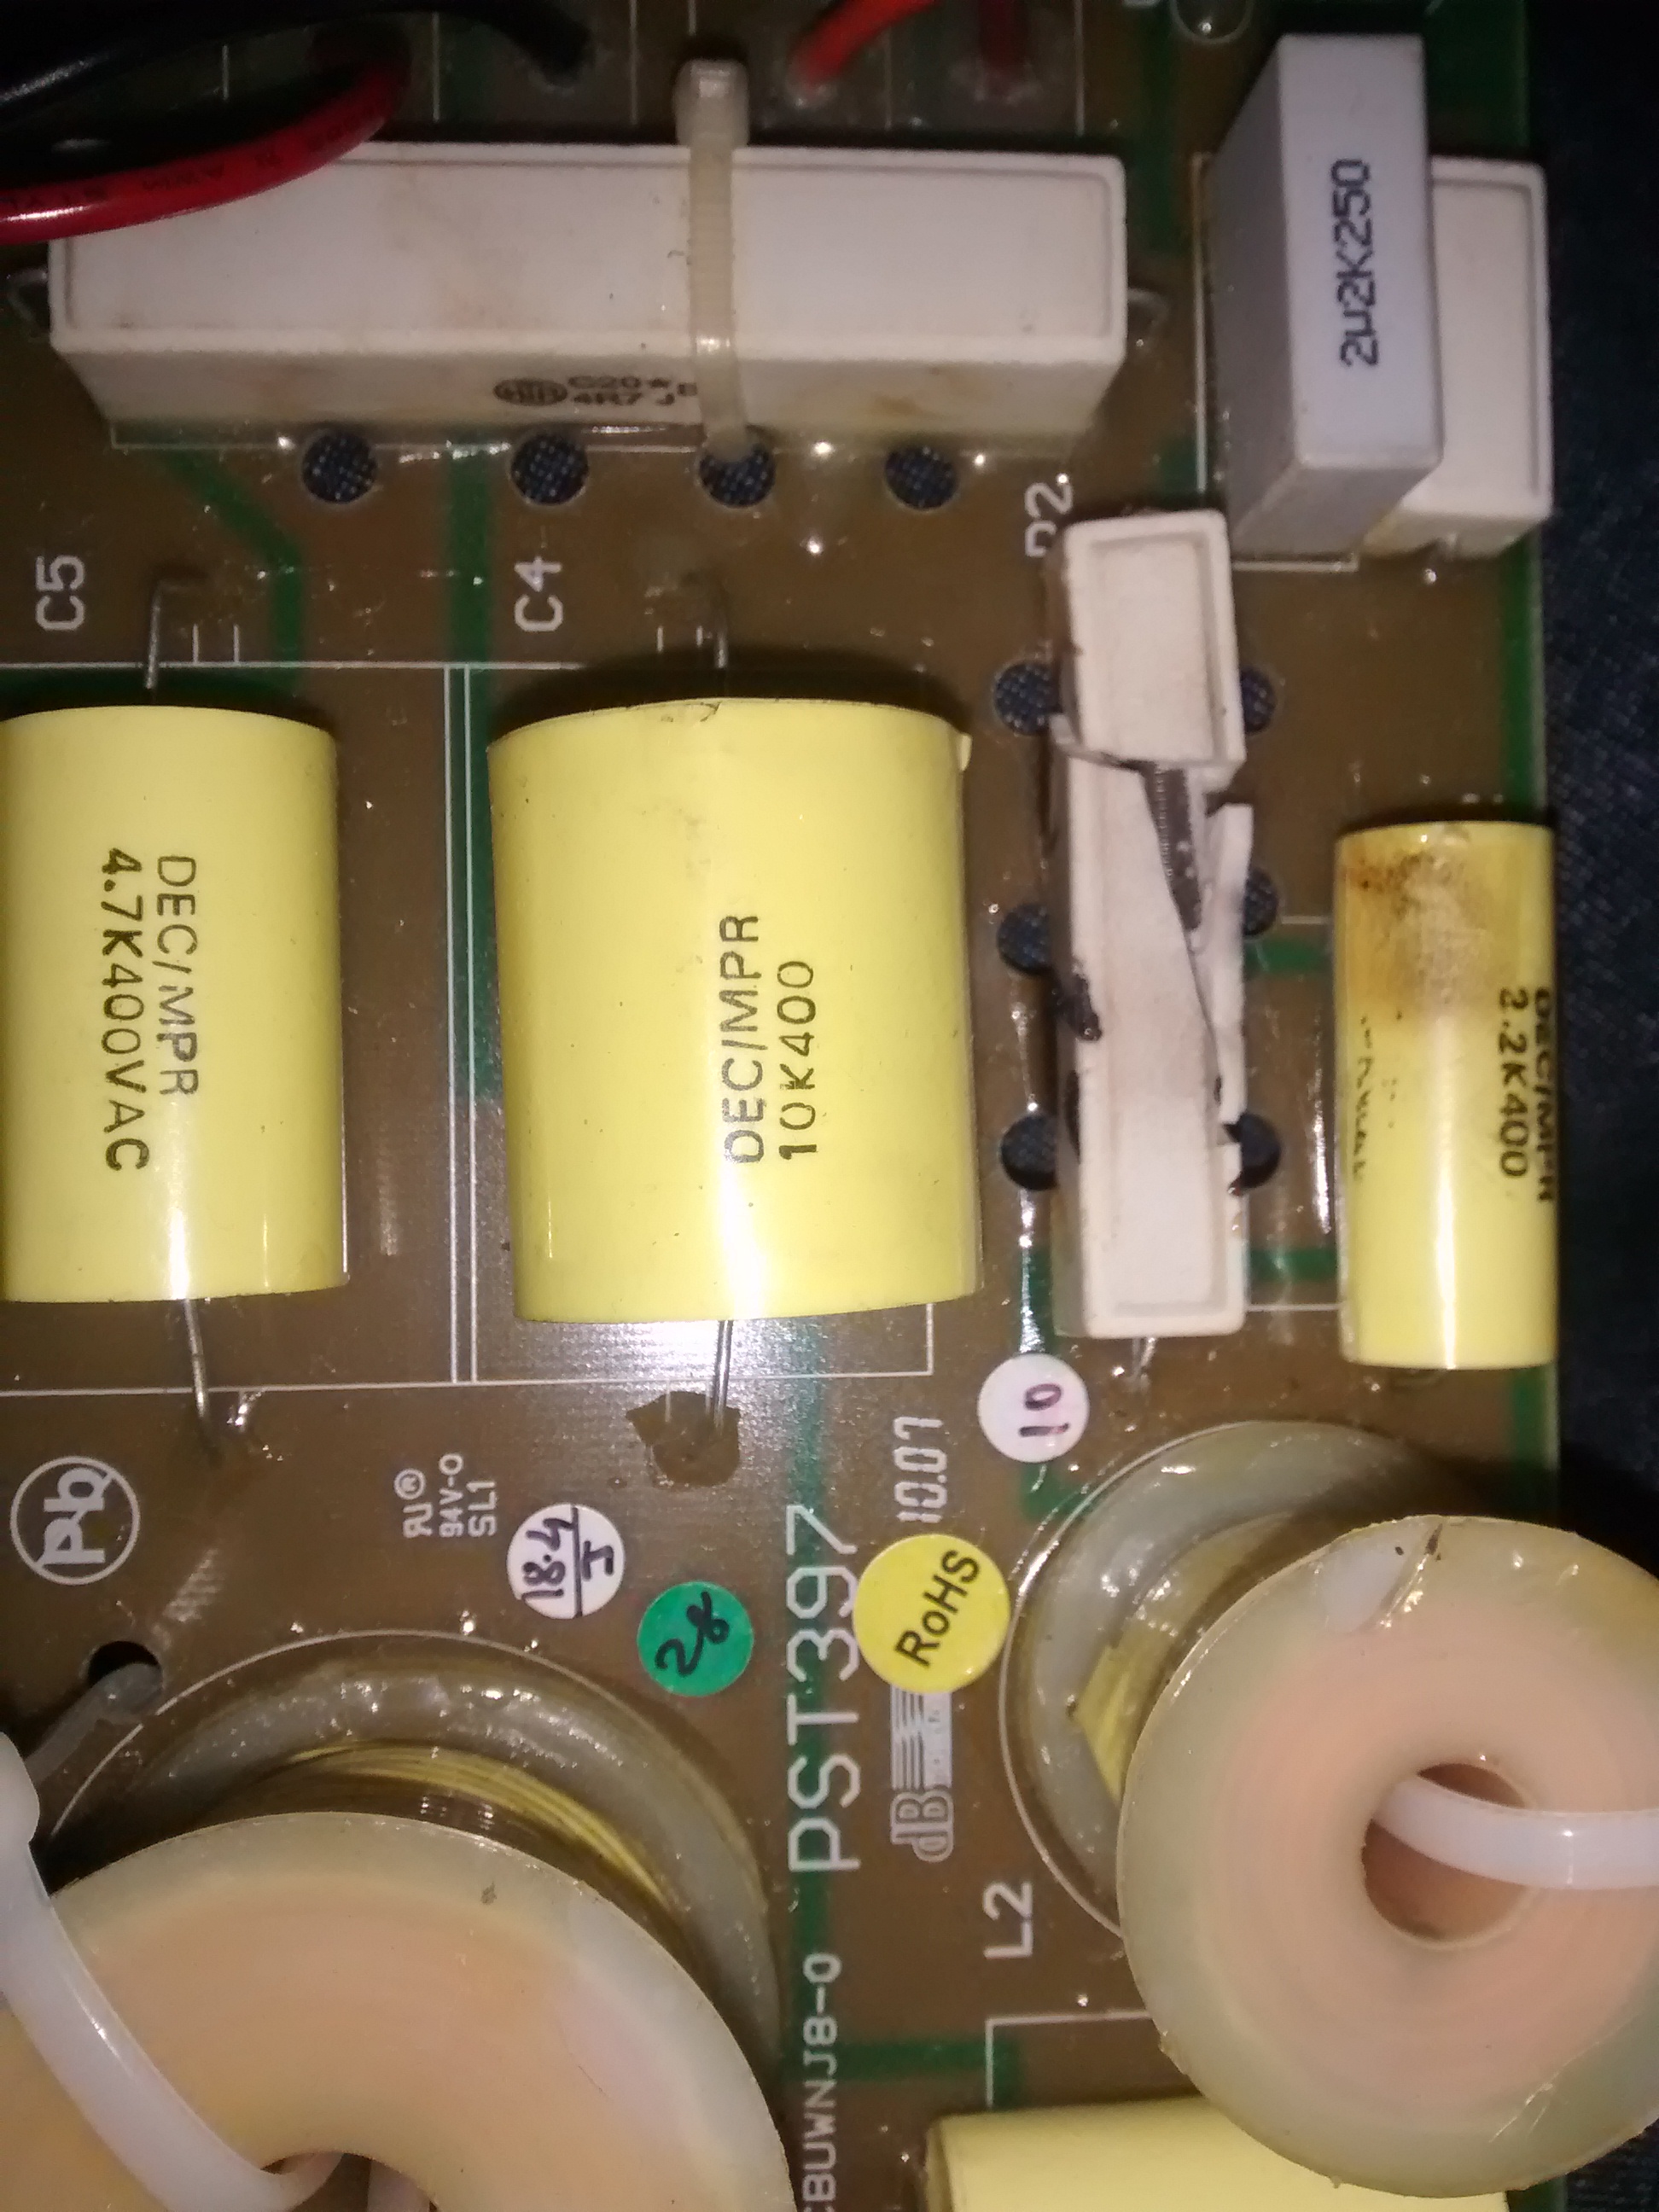
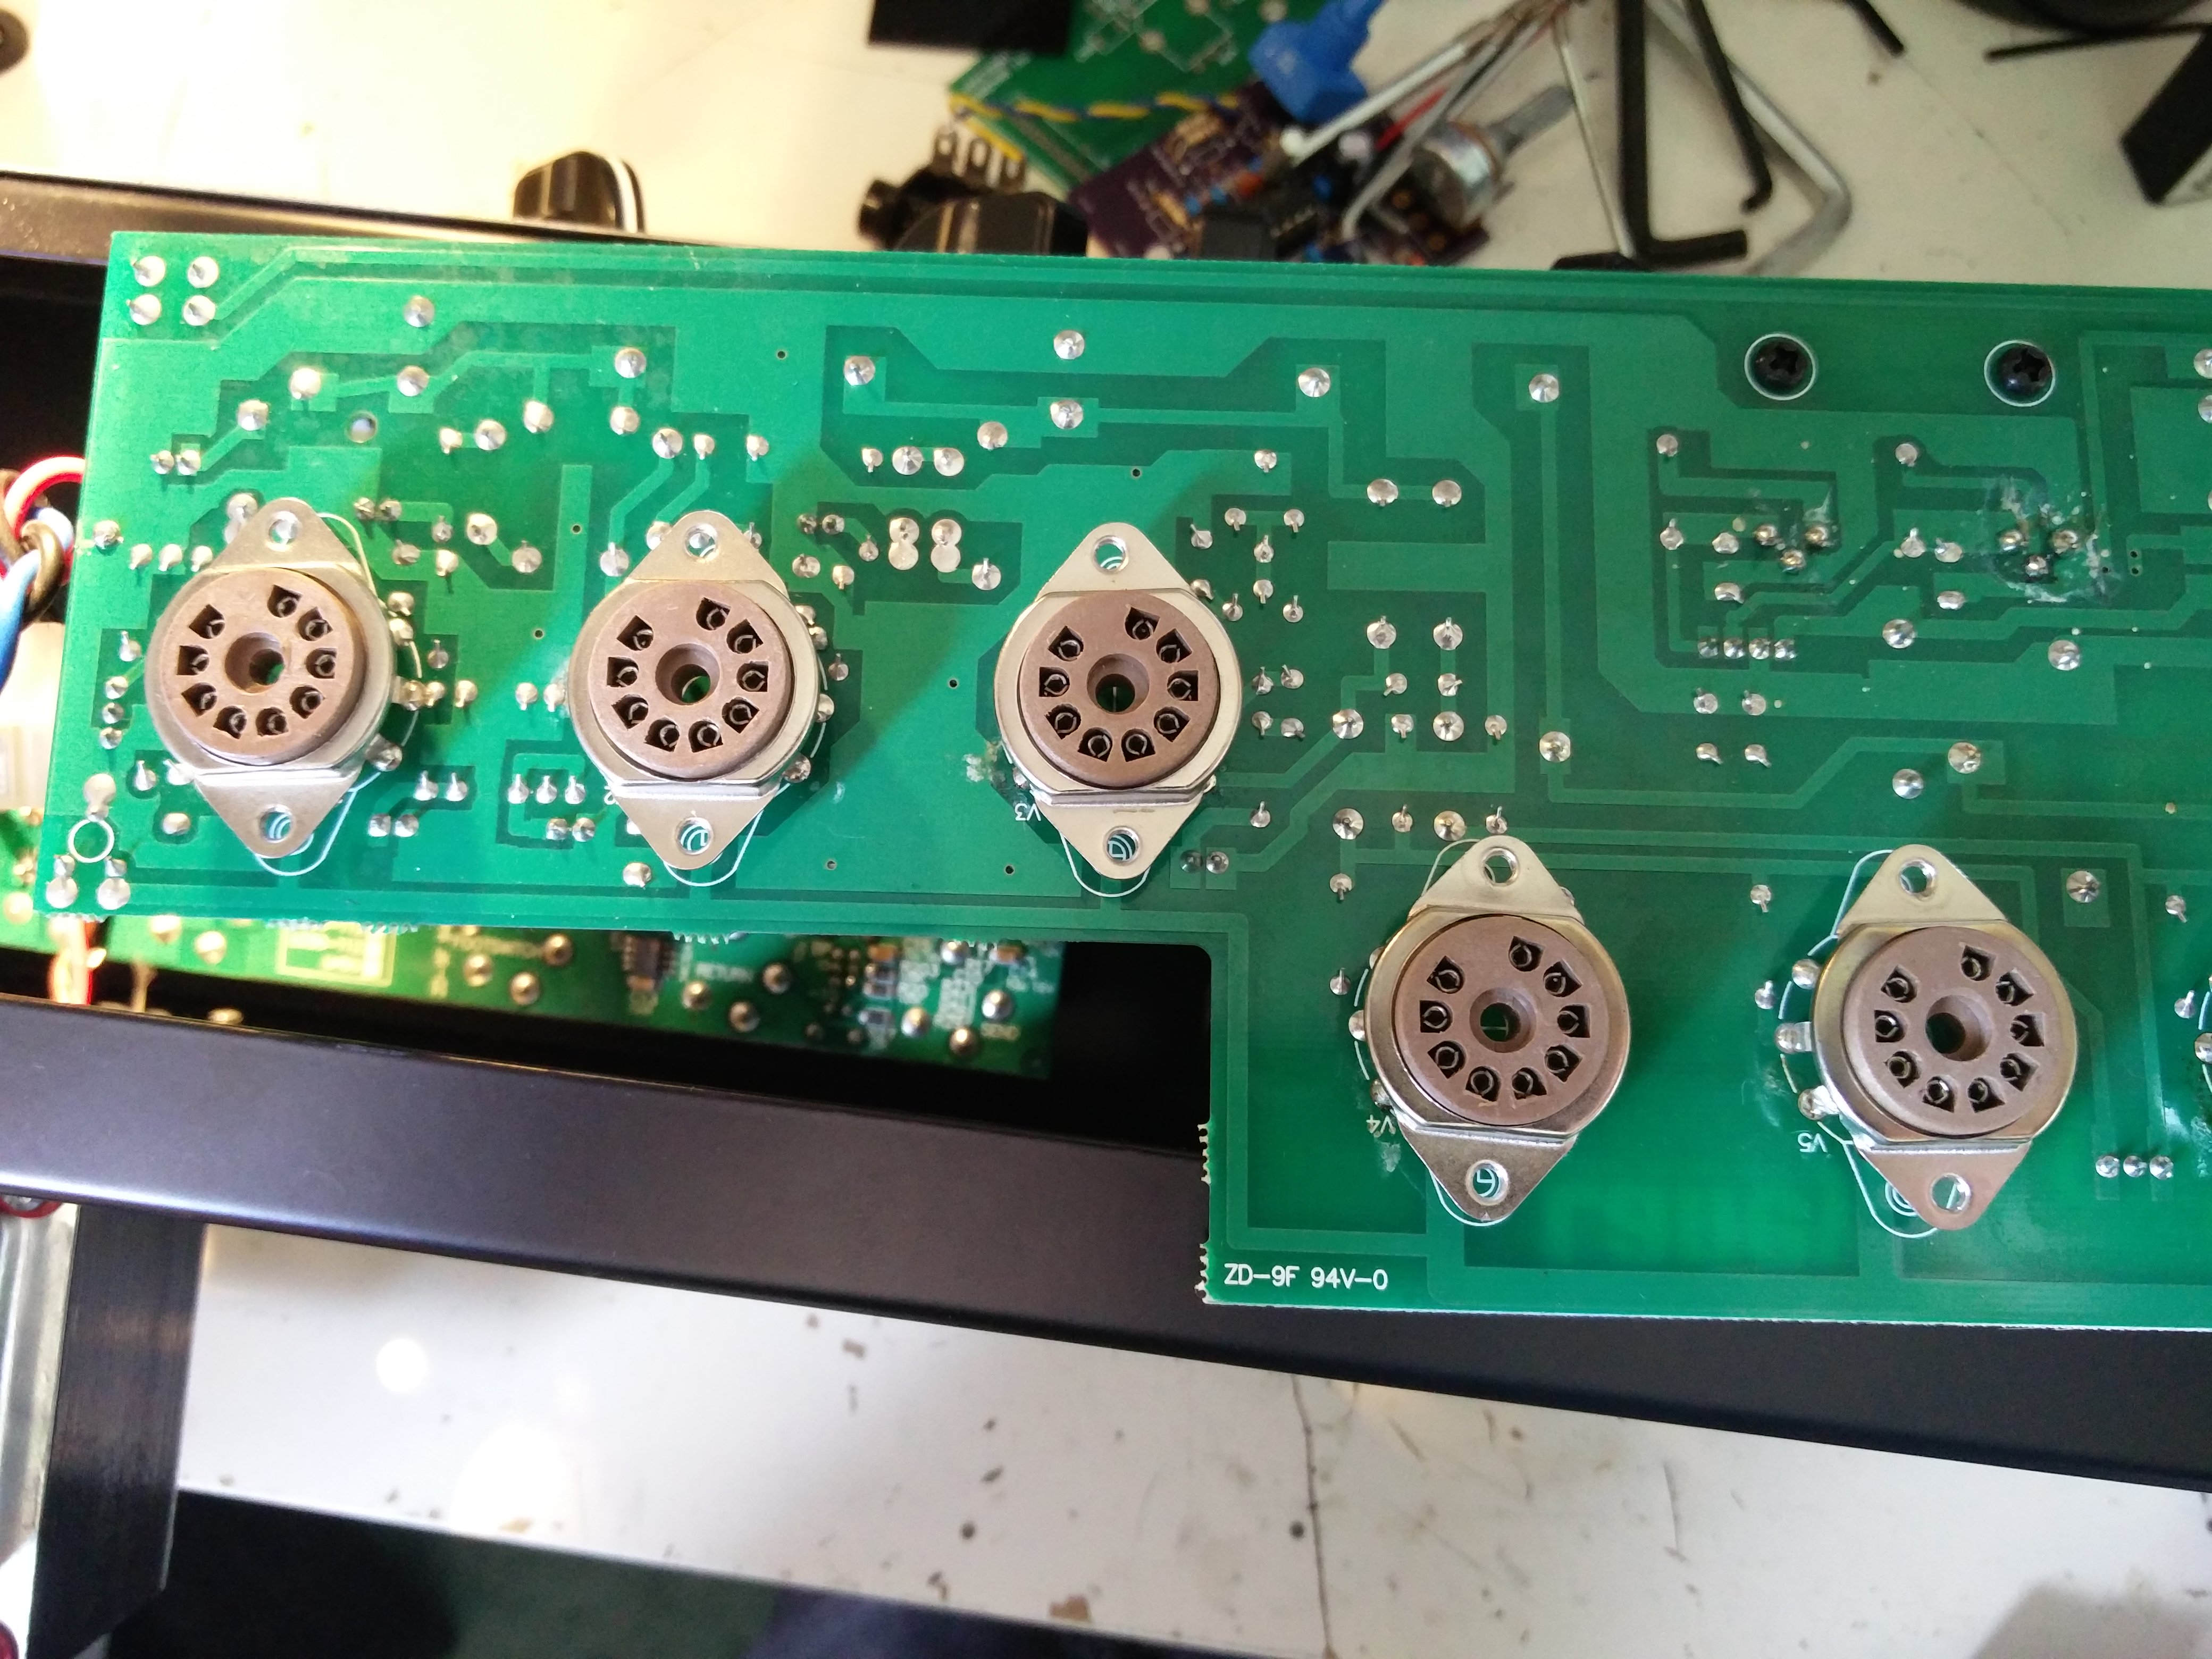
Actually, big smoke was obviously a problem that this amp had experienced in the past as can be seen in the image. A power valve had blown and seriously damaged the PCB. Unfortunately the amp had been taken to a Nottingham music shop for repair and I’m afraid they didn’t know what they were doing!

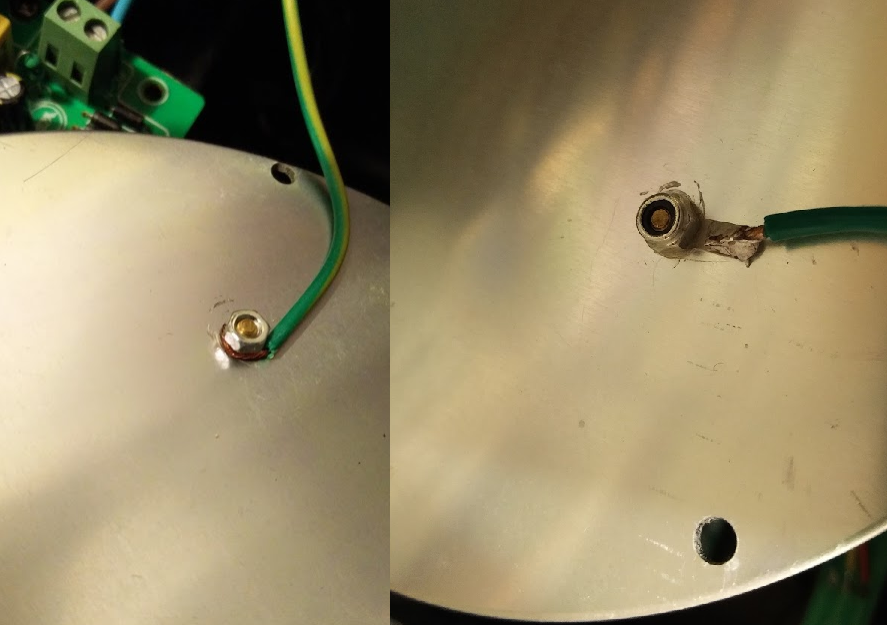
Whoever fixed it has did something weird and wired up a valve pin that doesn’t connect to anything – it should have been going to the cathode, although they have then wired up the cathode separately. There’s no actual harm with this, it just suggests they didn’t know what they were doing!
They also not secured the valve base very well, so it rocks and lifts the pins when you remove or move a valve. This has started to pull up a PCB track on one of the power valves. This will almost certainly cause problems in the future.

I’ve performed a temporary fix on the problem pin 7 by shaving the solder mask off the copper and adding more solder to give the pin an extra connection.

I recommended rewiring the whole power stage at some point in the not too distant future because the amp is a bit of an accident waiting to happen. Unfortunately there wasn’t time to perform the full repair before the customer left for London.

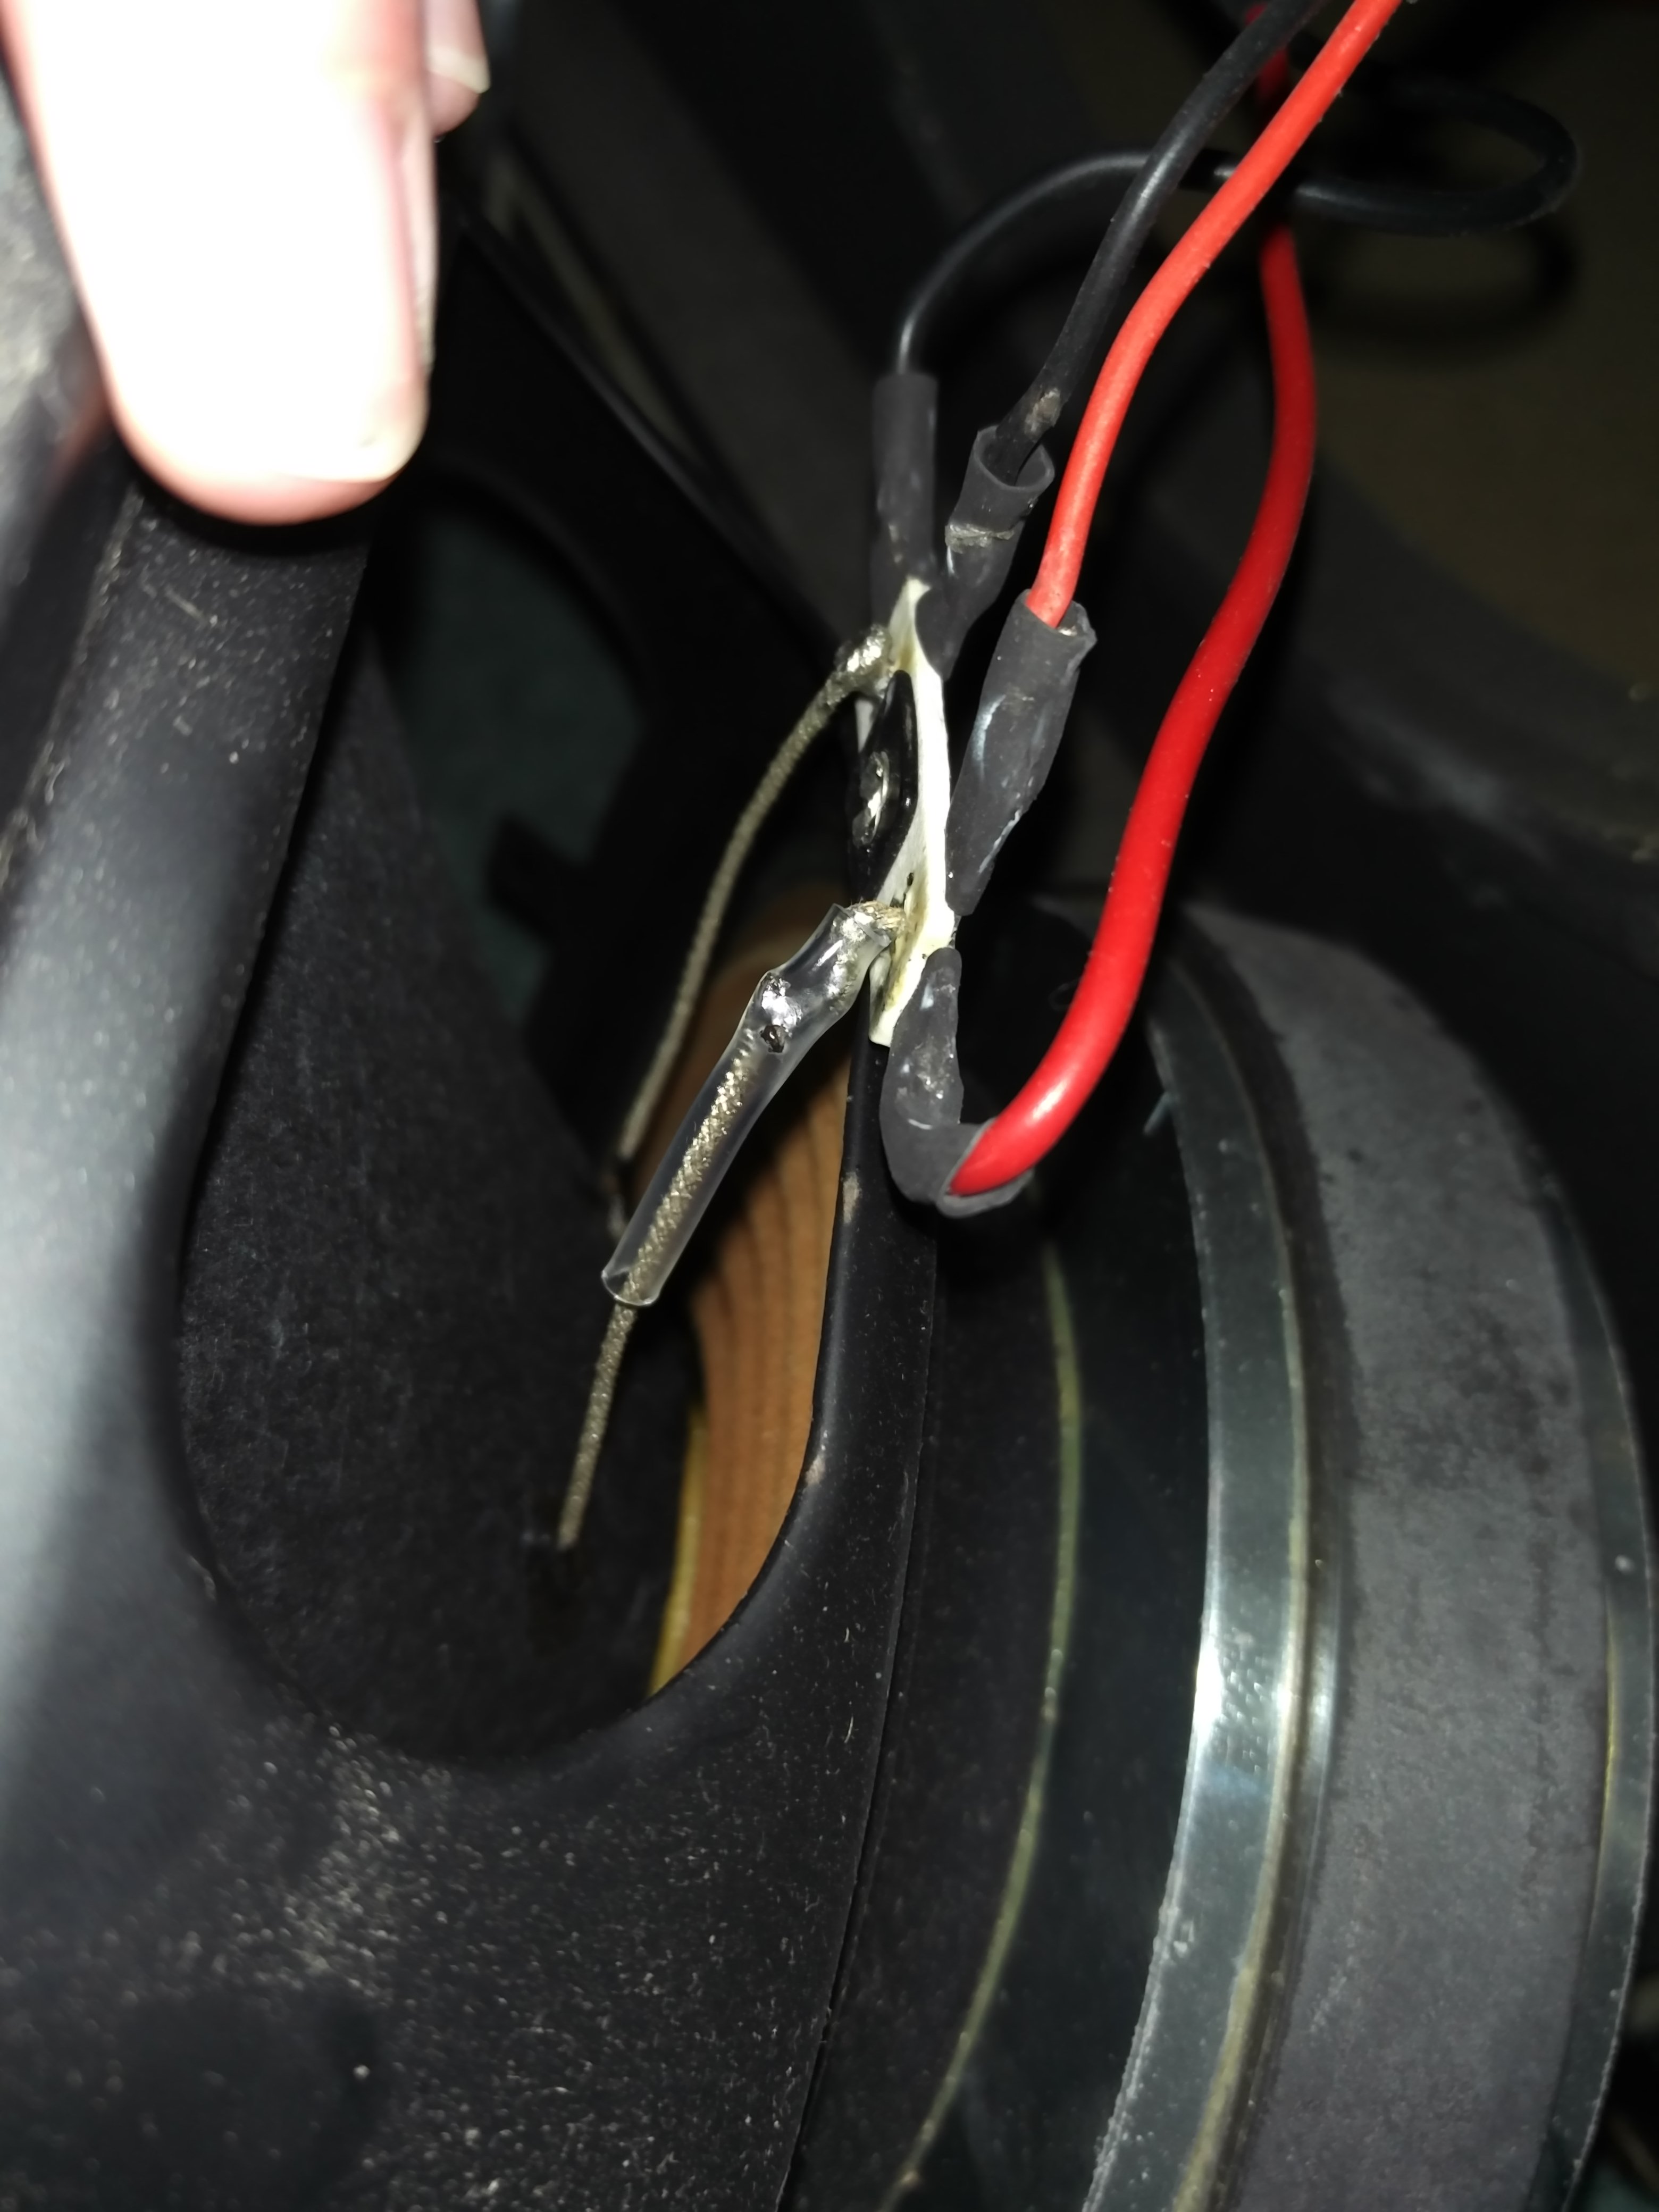
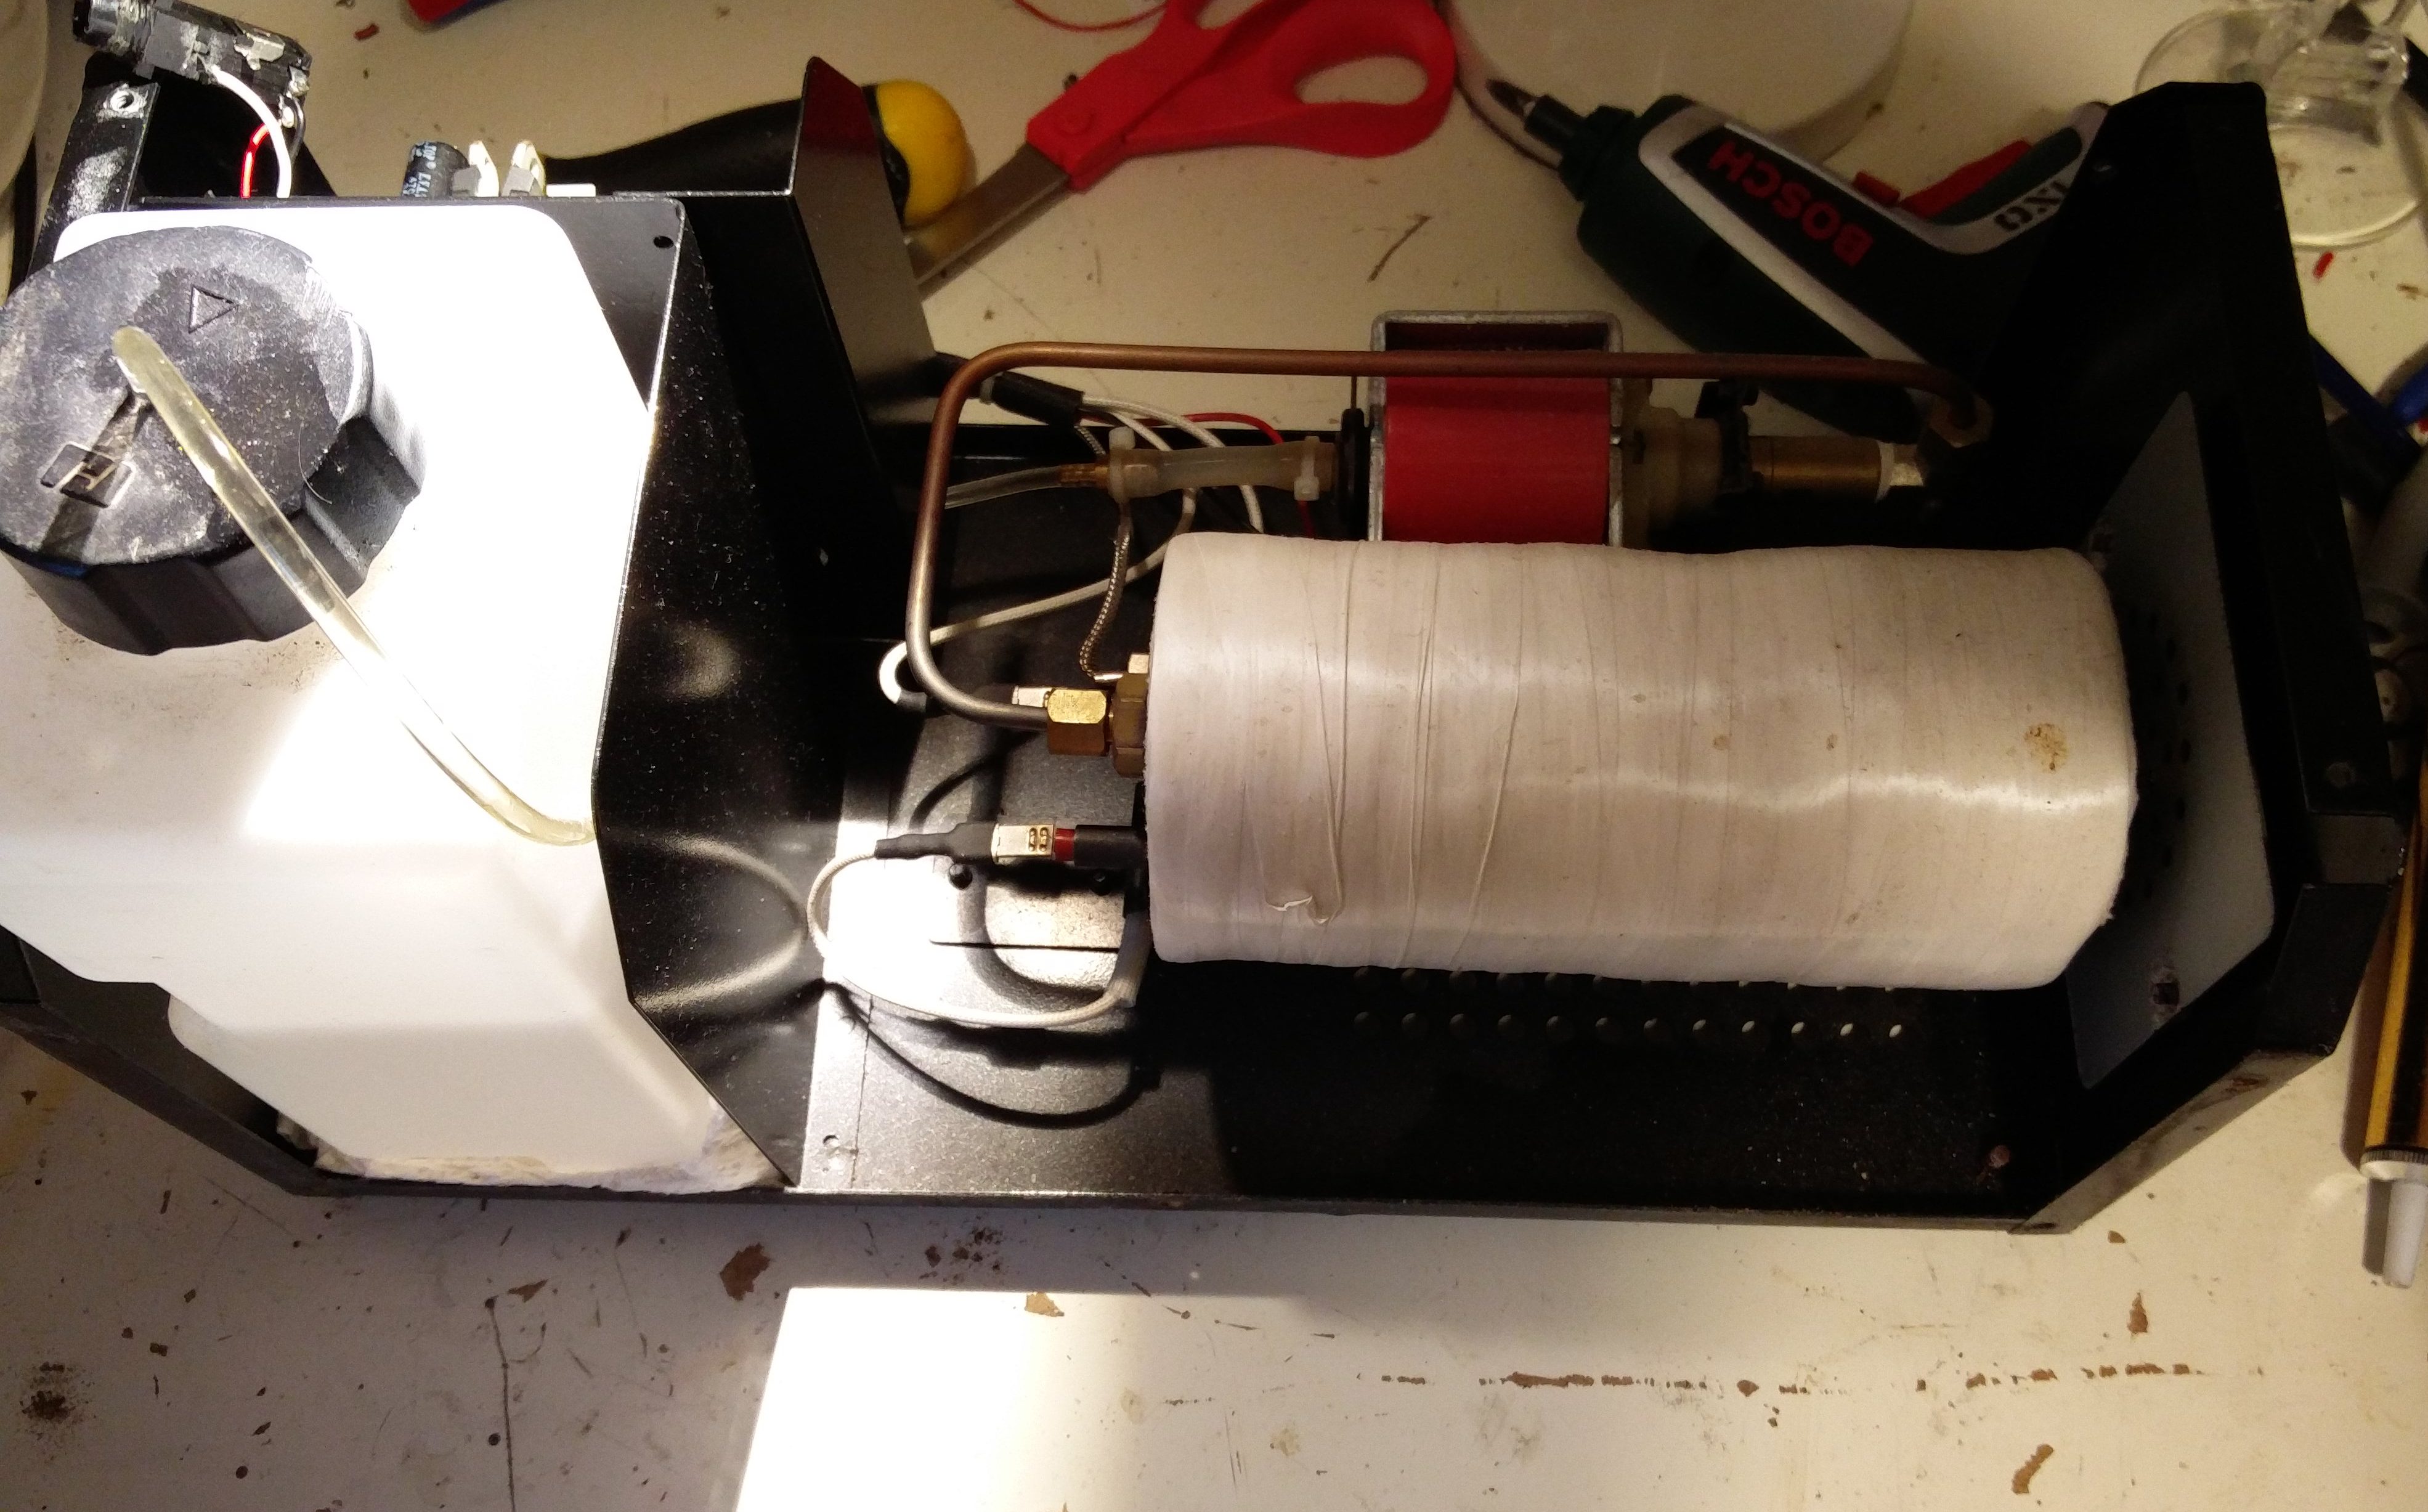
However all this was a chance discovery. I was actually asked to look at a faulty spring reverb on this blues Junior repair. The problem turned out to be with the tank itself. I checked continuity and ground on the cables and observed signal getting to the tank and nothing coming out.

I’ve got a short Accutronics reverb tank kicking around from an amp I gutted so I thought I’d try it, The impedances didn’t match and it sounded terrible with the Blues Junior! But it proved that this was the only problem with the reverb.

The good news is that the customer could buy a spring reverb unit and fit it himself – you only need a screwdriver.

The customer was kind enough to leave a review on my Facebook page.

If you have a Fender blues junior repair, please get in touch.

Ashdown 550 Touring Repair

Ashdown 550 Touring Repair

The first task for last week was an Ashdown 550 Touring Repair, brought in from a Newark customer bec because the amp wasn’t making any sound – actually it was making a very weak tinny sound. I like ‘no output’ or low output repairs – they’re often easy to fix. Fortunately this was the case here.

The problem turned out to be a faulty speaker connection. The touring 550 has two 10″ LF drivers and a little HF driver. There was a loose connection in one of the LF drivers – I suspect from the way that wire broke that it had been badly wired in the factory. The weak, tinny sound was the tweeter operating on its own. I re-soldered this connection and added some heatshrink to support the connection. And the amp was working!
Ashdown 550 Touring Repair
It was obvious from the external state of the amp that it had been kept in a damp environment – the tolex and top wood layers had swollen around the screw joints and the fixings were horribly rusted. The owner had bought this amp in the faulty state, so I then proceeded to give the amp a 1 hour service to check for any further sonic gremlins.

The amp uses two preamp valves – 12AX7s. These were unbranded valves but tested fine on my valve tester.

I discovered that the master volume pot was quite badly oxidised, but cleaned up nicely with a bit of Caig DeOxit D5. The gain pot had similar problems. I also cleaned the sockets and the valve bases as a precaution.

Checking the output level into 6.8 ohms the amp produced >288W. This is about right for a 550W amp rated into 4 ohms, which would produce a proportionately larger signal, allowing for transformer sag.
 Ashdown 550 Touring Repair
If you have an Ashdown 550 Touring Repair, please get in touch.

Hughes and Kettner Tubemeister repair

I’ve wanted to do a tubemeister repair since they first came out a few years back. I guess it’s a testament to general quality that this is the first to appear on the bench. I’m a big fan of the design aesthetic. 3 channels and a midi switching amp for £550ish is a lot of bang for your buck.

However, the owner was more worried about a different kind of bang – and a flash behind V1 when he flicked the standby switch. Afterwards the amp wasn’t making any sound at all.

Hughes and Kettner service manuals are easily the most detailed of any of the modern manufacturers I’ve seen (honourable mention goes to Roland/Boss) but this wasn’t needed to disassemble the chassis and get back to the PCB. The chassis is all metal which reduces weight and size. There’s a bent metal lid, removable end pieces and a separate metal base.

Hughes and Kettner have a power tube management system called TSC. This checks tube balance and bias. Orange amps have a similar system (see orange amp repair). The Hughes and Kettner TSC can occasionally fail and show up an error code on the TSC lights. The parts must then be replaced with these parts. But that wasn’t necessary here.

I discovered that the HT fuse had blown, which accounts for the bang the player heard. The valves all tested good, but since the TSC turns on the power tubes using a FET in the cathode I strongly suspected the power valves. After replacing the valves and the fuse the amp came back to life!

If you have Hughes and Kettner tubemeister repair, please just drop me a message and I’ll get you up and running again.

Bass preamp repair – Yamaha RBX JP4

This recent bass preamp repair was for a friend, bass player for professional party band the soul thieves. The preamp came from one of his backup instruments.

Identifying the circuit was a bit of puzzle due to conflicting information on the web. The bass preamp has bass and treble controls, a blend for the pickups, a master volume, two trimmers for gain, a mid frequency select knob and a mystery mid switch.Yamaha bass preamp repair, notch with bass and treble at max

The model later became the John Pattitucci signature model. Certain other builds have piezoelectric inputs.

The repair was relatively simple – the unit was producing no sound on either pickup which turned out to be a loose connection between the two board layout. It’s worth noting that later units were a single board design.Yamaha bass preamp repair, bass and treble responseYamaha bass preamp repair, notch with bass and treble at minimum response

The graphs of the response show the range of bass and treble control as well as the performance of the mid frequency control with bass Andy treble at max and minimum.

If you have a bass preamp repair, please get in touch and I’ll get it sorted for you.

Wireless mic repair – Line 6 XD-V30

Wireless mic repair - line 6 XD-30

This wireless mic repair came in from the singer of Newark soul band the Acetones.

Both units powered up but no sound came from the receiver when the mic was used.

Upon investigation I discovered that the transmitter and receiver were able to communicate. They use 2.4GHz. The unit has 6 wireless channels, all of which were communicating, but not passing audio.

wireless mic repair

I discovered that the connection between the capsule and the transmitter was broken. The connection was made by 3 sprung pins on the transmitter and 3 concentric gold plated rings on the capsule. It’s a nice idea to allow easy swapping of capsules and easy manufacture, but here it wasn’t working properly! I soldered the two modules together permanently to ensure a good connection.

If you have a wireless mic repair, please get in touch.

PA speaker repair – dB Arena 10

pa speaker repair

Last year I completed a PA speaker repair, I’ve just found the photos of the damaged crossover so I thought I’d blog the repair.

The owner had bought a pair of these nice dB Arena 10 speakers from a disreputable eBay seller. One was working, but the other had a fried HF compression driver and a damaged crossover.

Fortunately the 1 inch dB compression drivers are commonly available from the likes of Thomann so this was easily replaced.

A resistor had also burnt out in the crossover so I replaced this with a higher spec part.

Upon completion I graphed the frequency response of the crossover and compared it with a known good unit.db arena repair

If you have a Pa speaker repair, please get in touch.

Dunlop MC404 CAE Wah pedal repair

Dunlop MC404 CAE Wah Pedal repair

In October last year I fixed this wah pedal repair for a lincoln customer. The pedal would not turn on, possibly as a result of the user plugging the wrong power supply in.

Often pedals aren’t economical to repair, but a unit like this is normally worth it. In this case it was a fairly simple repair, completed within the first hour and the completed wah pedal repair cost only £35.

if you have a wah pedal repair, please get in touch.

Laney VC30 – Clean channel distorted Repair – Keld AMpworks, Newark, Worksop

Laney VC30 Clean channel distorted

My customer brought this Laney VC30 from Worksop to my Newark workshop complaining that the clean channel distorted. It’s a pity, because he’d kept it in pristine condition!

Two other attempts had been made at repairing this fault. One by Laney themselves, and one by a local electronic engineer. Both had fixed the problem temporarily but it had re-appeared. Upon testing, the clean channel was very weak and distorted.

For this reason I took a different tack. At least one of the previous repairs had simply been replacing V1. This is a logical choice since V1A deals with the clean channel, but the valve tested as working and I suspected that the clean channel distorting problem was probably with an invisible dry joint in the valve socket. I reflowed all the joints on the socket and the problem dis-appeared. Of course I’ve guaranteed my work and in the unlikely event that the problem re-appears again I’ll take the amp straight back in.

I also noticed that the output valves were very poorly matched. This wasn’t causing the problem clean channel distorted problem, but it was worth rectifying to alleviate future issues.

I noticed some interesting design changes in the VC30 – compared to other Laney VC amps that I’ve repaired. Most interestingly, Laney have swapped their traditional spring reverb for a digital reverb based around the SPIN ASM reverb chip that they’ve used in other recent ranges, such as the Cub.

If you have a Laney VC30 or a clean channel distorted repair, please get in touch.

Smoke machine repair

smoke machine repair

A smoke machine repair, brought to my Newark workshop by a Grantham based DJ.

This is a fairly simple unit: A power supply, a thermostat and a relay to control the power to the smoke heater. There is also an external remote on a 6.5mm 3 pole jack cable.

The customer was finding that the relay sometimes did not switch on the heater. The problem was intermittent, meaning that it would sometimes happen, but sometimes it would not! Despite filling my workshop with smoke on many occasions, I couldnt replicate the fault.

Upon investigation, I discovered that the jack socket had a slightly loose sleeve connection so I replaced the socket with another. After a bit more smoking the problem still didn’t manifest itself, so I returned the unit to the customer.

If you have a smoke machine repair for me, please get in touch.

LED lighting repair – Unbranded LED Parcan

LED lighting repair - Safety Earth repair

This LED lighting repair was a bit of a horror story! Aside from fixing the problems with the two lights brought in, they needed several modifications to improve the unit safety.

They were brought to me by a Grantham based DJ. One of the lights wouldn’t power up, whilst the other had a flicker on the red LEDs.

The powerup issue was caused by a faulty power board. The unit has a cheap SMPS that the customer informed me had blown up before and been replaced by the manufacturer. Unfortunately they couldn’t provide spare this time so I swapped in the PSU from the Red flicker unit.
LED lighting repair - new grille
I then repaired the red flicker unit by reflowing the red joints on the front face. Although I found another off the shelf internal supply to fix this, the replacement boards were judged to be too expensive to warrant this course of action. Instead, I fitted a DC socket to allow the customer to power the unit from a cheap external power supply. This also gets around the safety issues detailed below by removing mains from the unit.

I was quite alarmed by the breaches of safety good practice in these LED lights.

The first thing that I spotted was dubious safety earth connection – shown in the picture. The manufacturer had simply twirled the safety earth round a mounting pillar and screwed a nut on top. Unsurprisingly, The earth connection was already loose when I opened the unit. I fixed this by soldering the wire to a solder tag and refixing to the pillar using a Nyloc nut. These are special nuts that do not loosen in the same way as traditional nuts. To comply with safety regulations, the safety earth should have its own fixing point, but this was impossible to modify without compromising the unit function.
LED lighting repair - new power board
The next safety issue that I noticed suring the LED lighting repair was that the board’s PSU was next to a grille with large holes, allowing a person with small fingers (a child) to inadvertently touch the AC mains through the chassis. this was particularly worrying, so I fitted a mesh with 3mm holes inside the existing grille. I used Nylon fixings to prevent any connection of the mesh to the mains board.

If you have an LED lighting repair, please contact me.